Reorder items with Drag and Drop using SwiftUI
Background
Earlier, we implemented a Drag and Drop feature for UICollectionView, which was basically used to copy the dragged item. Very useful for functionality like adding items to the cart.
Please check out the article if you’ve missed it.
Last week, we received a new requirement for providing drag and drop feature in the app to provide a better user experience.
The app is Justly: Systems, Habits, Goals available on both Android and iOS platforms if you want to have a look.
According to requirements, we had to allow users to prioritize their activity according to their needs. While we have done implementation with UIKit in the past, we never had a chance to do it using SwiftUI.
Today, we will explore the implementation we did from scratch.
For simplicity, we will not design the same screen as it will be a bit more time-consuming. Instead, we will just design a list of colored blocks that will allow us to reorder the list.
Alright, let’s begin!
Sponsored
We are what we repeatedly do. Excellence, then, is not an act, but a habit. Try out Justly and start building your habits today!
Create a Basic UI
Let’s start by adding a simple card view in the main view file.
struct ColorItemView: View {

    let backgroundColor: Color

    var body: some View {
        HStack {
            Spacer()
            Text(backgroundColor.description.capitalized)
            Spacer()
        }
        .padding(.vertical, 40)
        .background(backgroundColor)
        .cornerRadius(20)
    }
}
Let’s create a list screen that uses this card UI to create multiple colored cards.
struct ContentView: View {
@State private var draggedColor: Color?
@State private var colors: [Color] = [.purple, .blue, .cyan, .green, .yellow, .orange, .red]
var body: some View {
ScrollView(showsIndicators: false) {
VStack(spacing: 10) {
Spacer()
.frame(height: 40)
ForEach(colors, id: \.self) { color in
ColorItemView(backgroundColor: color)
}
Spacer()
}
.padding(.horizontal, 20)
}
.ignoresSafeArea()
.background(Color.brown)
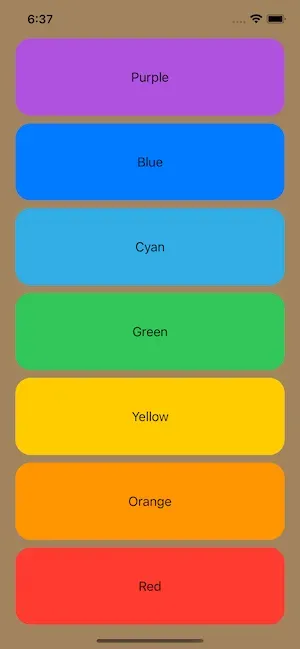
}
}If you run the app now, we will have the view as shown below.
Add a Drag Support
Let’s start our actual implementation.
Let’s first add drag support by just adding a .onDrag() modifier for each view that handles the dragging.
ColorItemView(backgroundColor: color)
    .onDrag {
        self.draggedColor = color
        return NSItemProvider()
    }
Adding the .onDrag() modifier turns on the dragging feature on that view.
In the closure, we are storing the dragged item in the state variable draggedColor. We will need that later to track the dragged color.
This closure is returning NSItemProvider as per requirement but we don’t really need to use it.
It also has one optional parameter named preview which is a ViewBuilder closure parameter, where we can define any view that we want to show as a preview of dragged UI. By default, it shows a small-sized dragged item as a preview.
Here’s the function signature,
.onDrag(<data: () -> NSItemProvider() -> NSItemProvider>, preview: <T() -> View>)
Let’s run the app and as you can see, we are able to drag the card around the screen.
Add Drop Support and Update the List
Same as the drag modifier SwiftUI also has .onDrop() to observe the dragging movements above the other views after dragging the item to change the list accordingly.
However, its syntax is a bit more complex than the .onDrag(). We will use it to reorder the list.
Here is the updated code for the drop modifier,
ColorItemView(backgroundColor: color)
    .onDrag {
        self.draggedColor = color
        return NSItemProvider()
    }
    .onDrop(of: [.text],
            delegate: DropViewDelegate(destinationItem: color, colors: $colors, draggedItem: $draggedColor)
    )
Now, you might be thinking what is .text and DropViewDelegate, let’s understand it in detail.
The syntax of the onDrop function is as below —
.onDrop(of: <[UTType]>, delegate: <DropDelegate>)
This function takes a delegate that is used to provide information to us related to the drop destination, so we can update the items accordingly.
1. UTType: It’s a supportedContentTypes, that is a uniform type identifier that describes the type of content that the view can accept through drag-and-drop.
- If the drag-and-drop operation doesn’t contain any of the supported types, then this drop destination doesn’t activate.
If Xcode doesn’t recognize UTType, import the UniformTypeIdentifiers framework.
2. delegate: A type that conforms to the DropDelegate protocol.
- We have complete control over the drop behavior when we use this delegate.
We have added the class conforming to the DropDelegate protocol named DropViewDelegate in the parameter, which creates a drop delegate object for every view in the loop.
Here is our initial DropViewDelegate class implementation,
struct DropViewDelegate: DropDelegate {

    let destinationItem: Color
    @Binding var colors: [Color]
    @Binding var draggedItem: Color?

    func dropUpdated(info: DropInfo) -> DropProposal? {
        return DropProposal(operation: .move)
    }

    func performDrop(info: DropInfo) -> Bool {
        draggedItem = nil
        return true
    }
}
This is a basic class for enabling the drop behavior with the .move operation. These both methods are the delegate methods of the DropDelegate protocol.
Run the app.
I think you are still not able to drop the dragged card, for that, we have to update our list with the selected item.
Let’s add the view updating logic in this class,
func dropEntered(info: DropInfo) {
    // Swap Items
    if let draggedItem {
        let fromIndex = colors.firstIndex(of: draggedItem)
        if let fromIndex {
            let toIndex = colors.firstIndex(of: destinationItem)
            if let toIndex, fromIndex != toIndex {
                withAnimation {
                    self.colors.move(fromOffsets: IndexSet(integer: fromIndex), toOffset: (toIndex > fromIndex ? (toIndex + 1) : toIndex))
                }
            }
        }
    }
}
If you have read the code carefully, you probably noticed this delegate method has the real reorder item logic.
This function is mandatory to implement. The dropEntered() method will be called when an item is dragged into the view frame. On invocation, we just took a dragged item and the destination item and made the switch.
We have added the switch logic with the animation block so that it will look nice.
We are done now!
Run the app, this is the final look of our implemented app,
Well, now you might be thinking, it’s pretty easy, right? You bet it is!
Happy coding! 🤖✍🏻
Conclusion
That’s it for today, I hope you learned something!
Today we have just explored the reordering feature with drag-and-drop.
We can also explore it’s another feature of dropping the dragged item at another place by copping the item. We can use the Transferable protocol which is a new API, introduced in the WWDC 2022.
Related Articles


Whether you need...
- *High-performing mobile apps
- *Bulletproof cloud solutions
- *Custom solutions for your business.
