
Jetpack compose with Dagger/HILT, MVVM and NavController
Introduction
Hi guys, today we are going to explore how we can use Jetpack compose in an application that has multiple screens and uses MVVM.
Application will have two screens
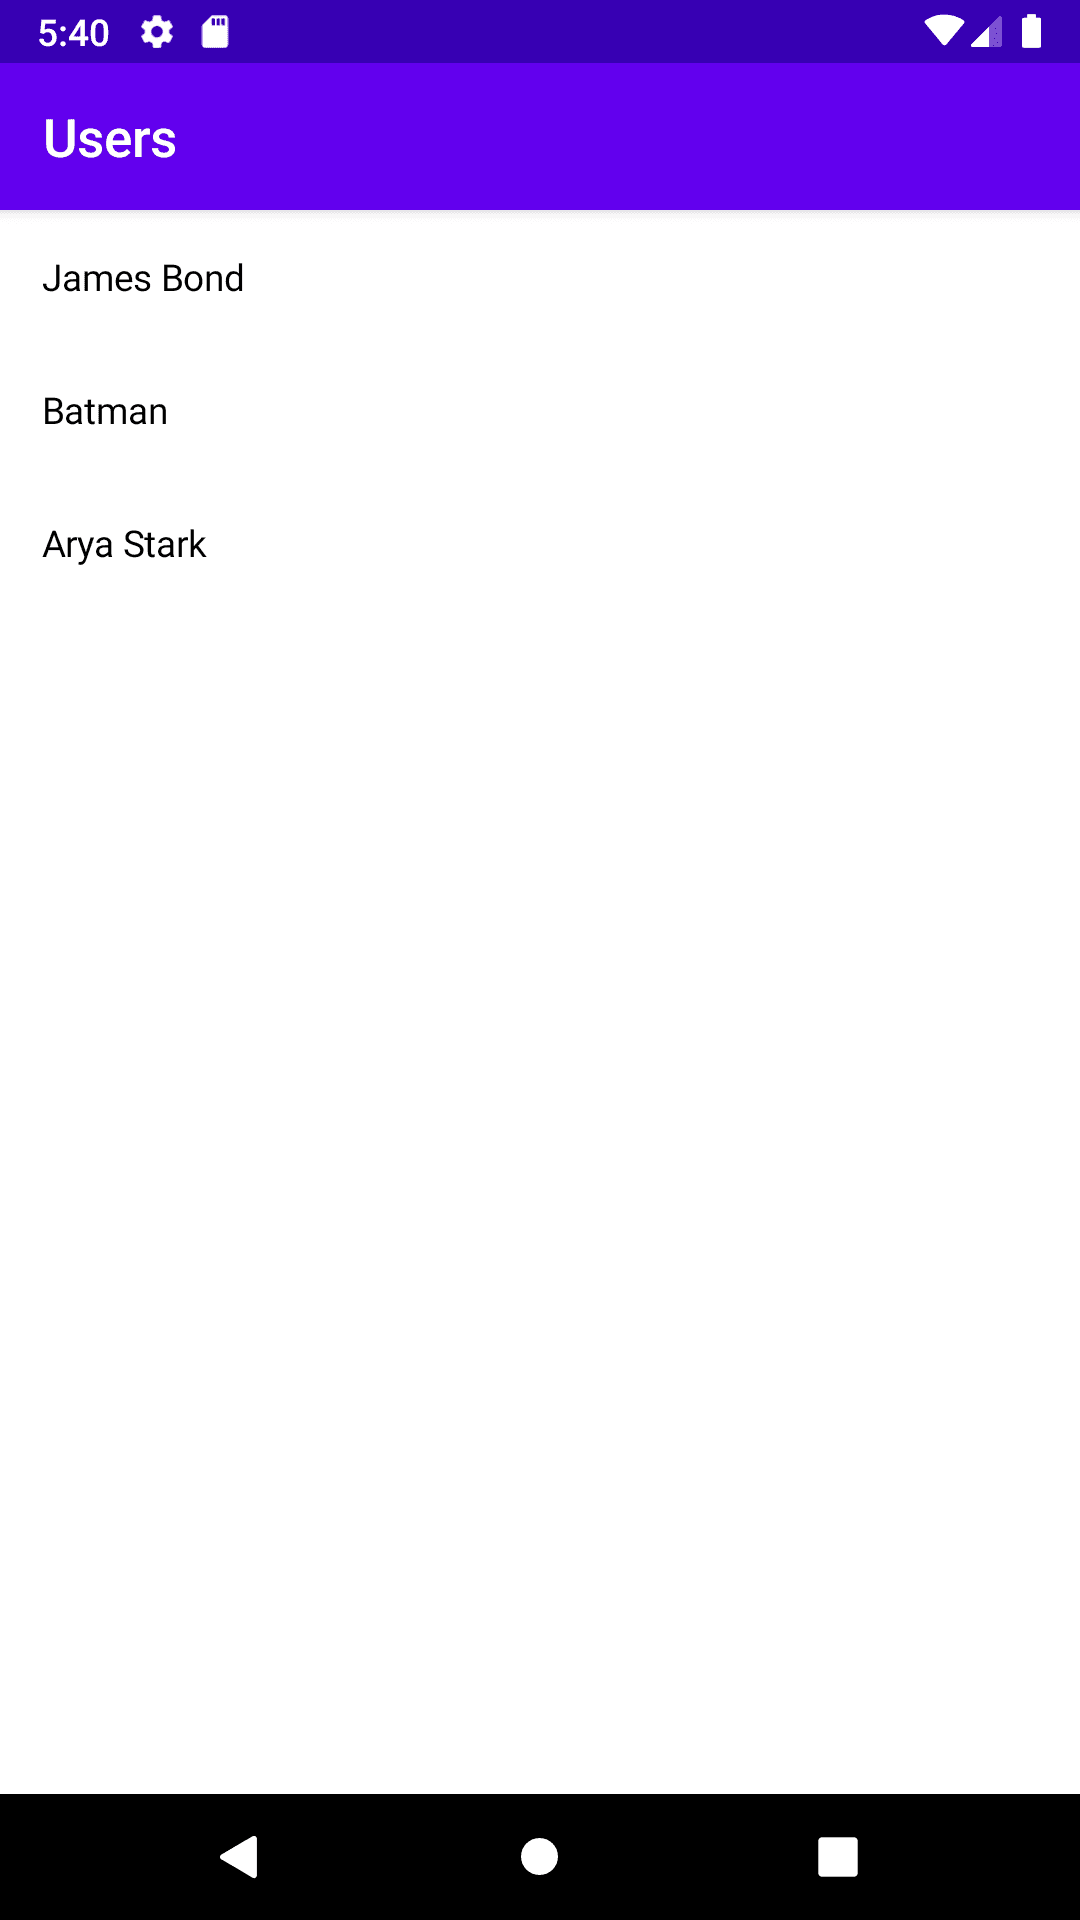
- Home screen — List of users
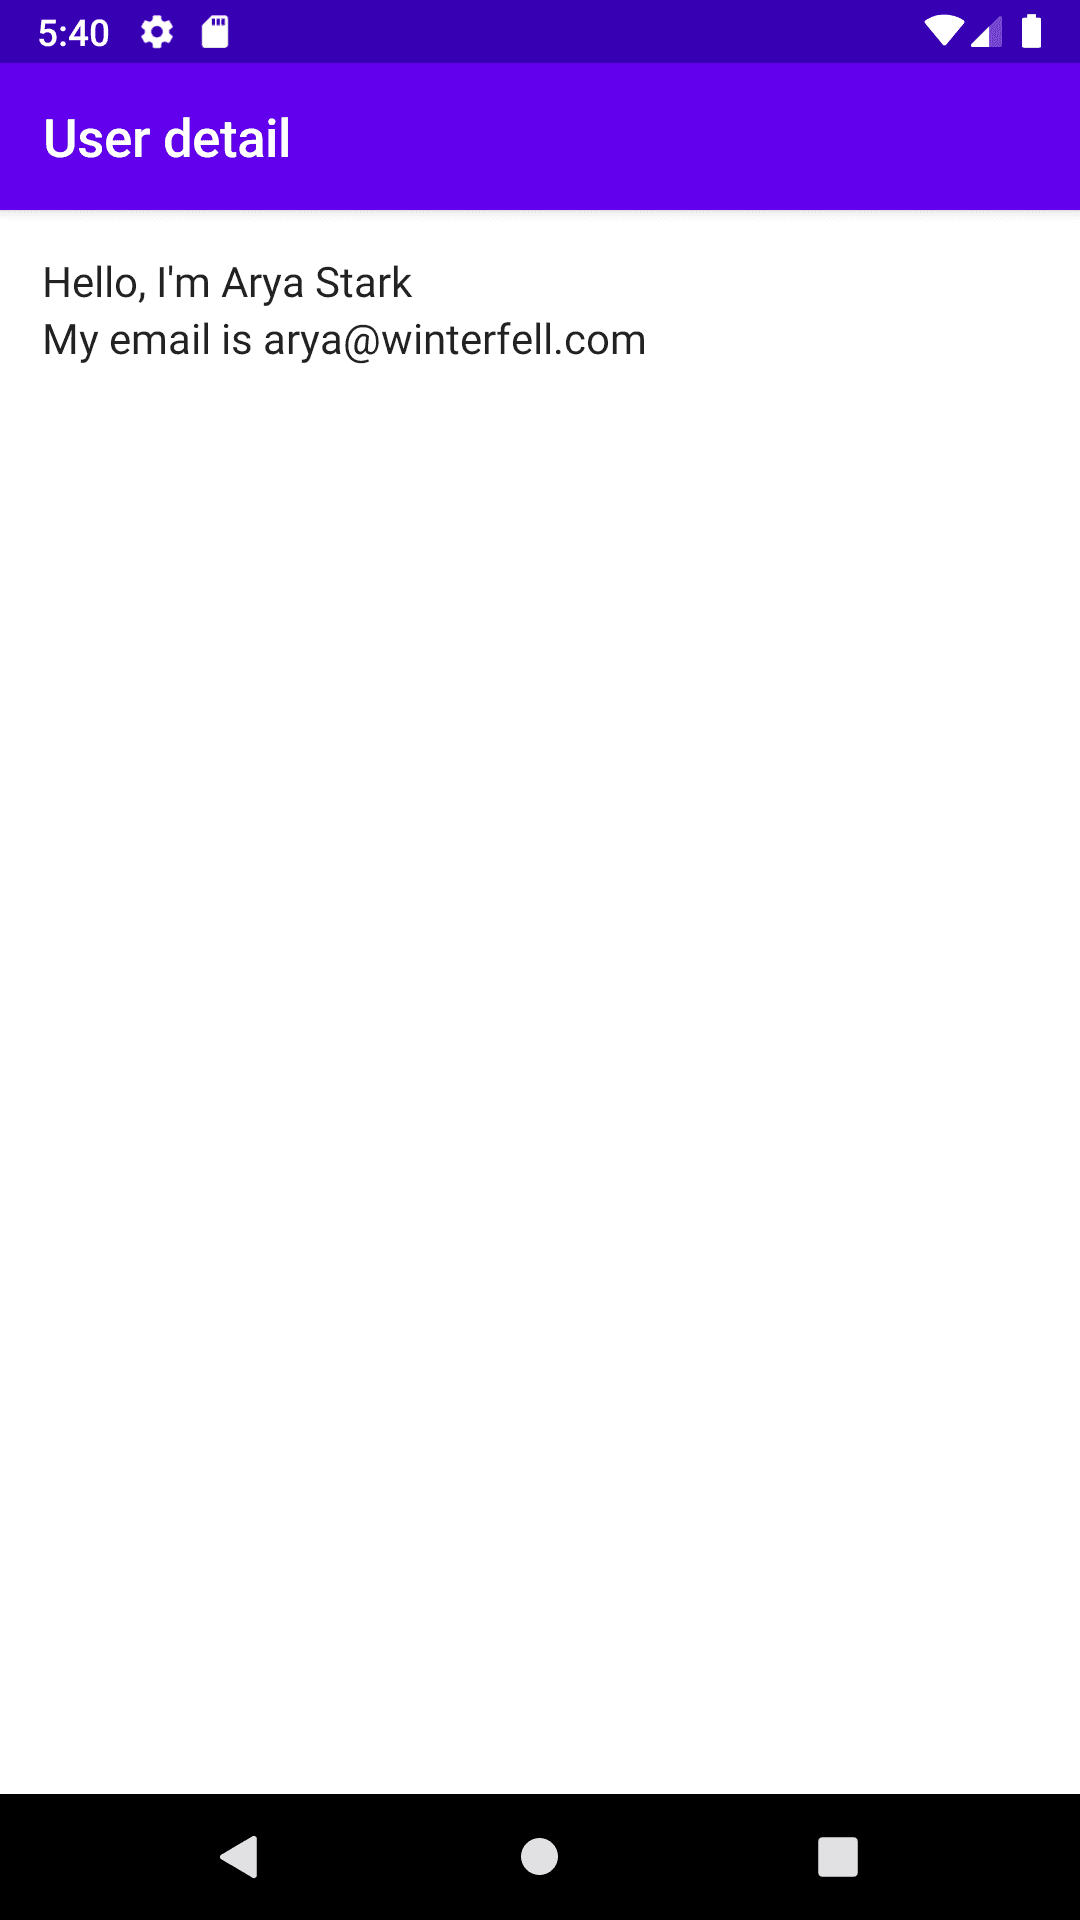
- User details screen — Details of the user, shown when we tap a user on home screen
We will also have a class UserRepository which provides list of users and user details, APIs required by the two screens mentioned above.
Alright!!
Sponsored
We are what we repeatedly do. Excellence, then, is not an act, but a habit. Try out Justly and start building your habits today!
Let’s begin!
1. Add repository
@Singleton
class UserRepository @Inject constructor() {
    fun getUser(id: Long): User? {
        return getUsers().find { it.id == id }
    }

    fun getUsers(): List<User> {
        return listOf(
            User(id = 123, name = "James Bond", "jamesbond@007.com"),
            User(id = 345, name = "Batman", "batman@cave.com"),
            User(id = 999, name = "Arya Stark", "arya@winterfell.com")
        )
    }
}

data class User(
    val id: Long,
    val name: String,
    val email: String
)
As you will notice, UserRepository does not have any dependencies, but it’s fine if you have a few! It defines two methods which will be used by home screen and user details screen.
We are using HILT for this example as that’s official recommendation. However, it’s easily configurable with dagger as well. We are not going to use any HILT specific feature.
Configuring HILT for any app very straightforward, just annotate Application class with @HiltAndroidApp
As we have application ready with HILT configuration and required repository, let’s start adding some UI!!
We will begin with home screen
2. Add HomeScreen
Home screen will be a composable as we are using Jetpack compose.
@Composable
fun HomeScreen(navController: NavController, vm: HomeScreenViewModel) {
    Scaffold(
        topBar = {
            TopAppBar(
                title = {
                    Text(text = "Users")
                }
            )
        },
        content = {
            Column {
                val users by vm.users.collectAsState()
                users.forEach { user ->
                    ClickableText(text = AnnotatedString(user.name), Modifier.padding(all = 16.dp),
                        onClick = {
                            navController.navigate("users/${user.id}")
                        })
                }
            }
        }
    )
}

@HiltViewModel
class HomeScreenViewModel @Inject constructor(val userRepository: UserRepository) : ViewModel() {
    private val _users = MutableStateFlow(userRepository.getUsers())
    val users: StateFlow<List<User>> = _users
}
Pretty straightforward, isn’t it? Except that you will not have idea where NavController and HomeScreenViewModel come into picture! Don’t worry about that for now, we will go through it when we use this composition.
Now let’s define our second and last screen
3. Add UserDetailScreen
@Composable
fun UserDetailScreen(navController: NavController, vm: UserDetailScreenViewModel, userId: Long) {
    Scaffold(
        topBar = {
            TopAppBar(
                title = {
                    Text(text = "User detail")
                }
            )
        },
        content = {
            Column {
                vm.load(userId = userId)
                val user by vm.user.collectAsState()
                Column(Modifier.padding(all = 16.dp)) {
                    Text(text = "Hello, I'm ${user?.name}")
                    Text(text = "My email is ${user?.email}")
                }
            }
        }
    )

}

@HiltViewModel
class UserDetailScreenViewModel @Inject constructor(val userRepository: UserRepository) :
    ViewModel() {
    private val _user = MutableStateFlow<User?>(null)
    val user: StateFlow<User?> = _user

    fun load(userId: Long) {
        _user.value = userRepository.getUser(id = userId)
    }
}
Nothing fancy here as well. ViewModel takes userId in load function and gets the user from UserRepository . It provides a StateFlow with user variable and our Composable gets user from there and shows some details on UI.
4. Update MainActivity
Now it’s time to make use of these two composables. We will use one activity architecture here, means there will be only one activity for whole app, other screens will just be composables. Let’s add our MainActivity , the last class we need to wrap up the application.
AndroidEntryPoint
class MainActivity : ComponentActivity() {
    override fun onCreate(savedInstanceState: Bundle?) {
        super.onCreate(savedInstanceState)
        setContent {
            UserAppTheme {
                Surface(color = MaterialTheme.colors.background) {
                    val navController = rememberNavController()
                    NavHost(navController = navController, startDestination = "home") {
                        composable("home") {
                            val vm: HomeScreenViewModel by viewModels()
                            HomeScreen(navController, vm)
                        }
                        composable("users/{userId}") { backStackEntry ->
                            val vm: UserDetailScreenViewModel by viewModels()
                            UserDetailScreen(navController, vm, (backStackEntry.arguments?.getString("userId", "") ?: "").toLong())
                        }
                    }
                }
            }
        }
    }
}
Here, we are setting content using Jetpack Compose, as you would have expected. Interesting part begins with
val navController = rememberNavController()Here we have used NavController , which will help us with navigation and deep linking URL to composables.
Next, we have defined NavHost , which we will set as content here. It makes use of NavController and allows us to define which path should show which composable and also allows us to define a default path, that will be shown by default.
5. Understanding NavController paths
We define two composable here, one for each screen. Let’s begin with HomeScreen
composable("home") {
                            val vm: HomeScreenViewModel by viewModels()
                            HomeScreen(navController, vm)
                        }
For home screen, we first get HomeScreenViewModel by standard MVVM android syntax. Here, injection will work even though HomeScreenViewModel has dependency on UserRepository as we have annotated it with @HiltViewModel . Once we have vm, we construct HomeScreen composable and we are done. Notice we are providing “home” string to composable constructor, that will deep link HomeScreen composable with “home” path.
For UserDetailScreen
composable("users/{userId}") { backStackEntry ->
    val vm: UserDetailScreenViewModel by viewModels()
    UserDetailScreen(navController, vm, (backStackEntry.arguments?.getString("userId", "") ?: "").toLong())
}
Here we get UserDetailScreenViewModel as normal. However, as we need to pass data to that screen, we first need to get it from backStackEntry . We get string parameter “userId” value and convert it toLong and construct UserDetailScreen composable.
You might be wondering how “userId” makes it way from HomeScreen to here, and that’s through NavController . On user item click, we push user detail screen with
navController.navigate("users/${user.id}")NavController match the path provided here with what we have defined in MainActivity and will pass text specified after users/ as backStackEntryargument.
That’s it!! We are done with the application, here’s what it will look like
Conclusion
Integrating Jetpack Compose with the MVVM architecture in a multi-screen application is both efficient and powerful. By organizing our app into a Home screen displaying a list of users and a User Details screen, we ensure a clean, navigable user interface.
Utilizing a UserRepository class to manage the necessary APIs and data flow further enhances the app's modularity and maintainability. This setup not only simplifies UI management but also promotes a robust structure for future enhancements and scalability.
Happy coding… 🤖
Related Useful Articles