Android — reactive programming with coroutines and MVVM
Introduction
This post shows steps to build an app using coroutines and MVVM architecture. In the end, you will have an app that fetches users from web API and display it in a RecyclerView. We will use web API https://jsonplaceholder.typicode.com/users to fetch users.
Let’s divide this post in two parts. In the first part, we will retrieve users from API and store it in a ViewModel and in the second part, we will bind users to a RecyclerView.
Sponsored
We are what we repeatedly do. Excellence, then, is not an act, but a habit. Try out Justly and start building your habits!
Part 1: Retrieve users from web API
Let’s start by adding retrofit and android lifecycle related dependencies in app level build.gradle.
// Retrofit
implementation 'com.squareup.retrofit2:retrofit:2.8.1'
implementation 'com.squareup.retrofit2:converter-gson:2.8.1'
def lifecycle_version = "2.2.0"
// ViewModel
implementation "androidx.lifecycle:lifecycle-viewmodel-ktx:$lifecycle_version"// LiveData
implementation "androidx.lifecycle:lifecycle-livedata-ktx:$lifecycle_version"// Annotation processor
kapt "androidx.lifecycle:lifecycle-compiler:$lifecycle_version"
Once done, you are ready to start fetching data from web API. Let’s define interfaceUserServices and create a global object using retrofit builder. Note that this is not a good practice for defining singletons, you should probably use a DI library like dagger or koin.
val userServices = Retrofit.Builder()
    .baseUrl("https://jsonplaceholder.typicode.com/")
    .addConverterFactory(GsonConverterFactory.create())
    .build().create(UserServices::class.java)
interface UserServices {
    @GET("users")
    suspend fun getUsers(): List<User>
}
Notice “suspend” keyword at the beginning of service definition. If you are not familiar with coroutines, I recommend having a look at it and come back here. In short, coroutines allow us to use asynchronous functions without callbacks.
Now let’s add code to define our UserViewModel
class UserViewModel : ViewModel() {
    val users = MutableLiveData<List<User>>()
    val message = MutableLiveData<String>()
    init {
        viewModelScope.launch {
            try {
                message.postValue("Loading...")
                val data = userServices.getUsers()
                users.postValue(data)
                message.postValue(null)
            } catch (ex: Exception) {
                message.postValue("Server encountered error.")
            }
        }
    }
}
It defines two Livedata fields:
1. users: state of our users list fetched from web API
2. message: state of message that needs to be shown, like loading, error etc.
During initialization, we launch coroutine with viewModelScope . It’s good practice to use it as android framework takes care of it’s lifecycle.
In coroutine block, we first set message to “Loading…”, so user will not see a blank screen if loading takes more time. After that, we start loading data from userServices and wait for it. As getUsers is a suspend function, kotlin will suspend coroutine until it fetches data. Once we get data, we post it to users livedata stream and set message to null.
On exception, we post error to message stream.
Part 2: Display users in MainActivity using RecyclerView.
Let’s a start by configuring build.gradle We will use view binding, so let’s add it first in android block.
viewBinding {
    enabled = true
}
and a few dependencies like activity-ktx and Recyclerview
implementation "androidx.activity:activity-ktx:1.1.0"
implementation "androidx.recyclerview:recyclerview:1.1.0"
implementation "androidx.constraintlayout:constraintlayout:1.1.3"
Awesome. Now let’s define our activity’s layout in activity_main.xml file.
<?xml version="1.0" encoding="utf-8"?>
<androidx.constraintlayout.widget.ConstraintLayout xmlns:android="http://schemas.android.com/apk/res/android"
    xmlns:app="http://schemas.android.com/apk/res-auto"
    xmlns:tools="http://schemas.android.com/tools"
    android:layout_width="match_parent"
    android:layout_height="match_parent"
    tools:context=".MainActivity">
    <androidx.recyclerview.widget.RecyclerView
        android:id="@+id/usersList"
        android:layout_width="match_parent"
        app:layoutManager="androidx.recyclerview.widget.LinearLayoutManager"
        android:layout_height="match_parent"/>
    <TextView
        android:id="@+id/message"
        android:layout_width="wrap_content"
        android:layout_height="wrap_content"
        tools:text="Loading..."
        app:layout_constraintBottom_toBottomOf="parent"
        app:layout_constraintLeft_toLeftOf="parent"
        app:layout_constraintRight_toRightOf="parent"
        app:layout_constraintTop_toTopOf="parent" />
</androidx.constraintlayout.widget.ConstraintLayout>
Now let’s define MainActivity
private lateinit var binding: ActivityMainBinding
private val model: UserViewModel by viewModels()
override fun onCreate(savedInstanceState: Bundle?) {
    super.onCreate(savedInstanceState)
    binding = ActivityMainBinding.inflate(layoutInflater)
    setContentView(binding.root)
    binding.usersList.adapter = UserAdapter().apply {
        model.users.observe(this@MainActivity, Observer {
            this.users = it
        })
    }
    model.message.observe(this, Observer {
        binding.message.text = it
    })
}
Here, we creating binding ActivityMainBinding and set it’s root as content view. Notice we don’t create viewmodel but use viewModels() to get it from kotlin activity extensions.
We create a UserAdapter and update its users variable by observing users livedata stream from ViewModel . Similarly, we update message view by observing message live data stream.
Here’s adapter implementation
class UserAdapter : RecyclerView.Adapter<UserVH>() {
    var users = emptyList<User>()
        set(value) {
            field = value
            notifyDataSetChanged()
        }
    override fun onCreateViewHolder(parent: ViewGroup, viewType: Int): UserVH {
        val binding = ItemUserBinding.inflate(LayoutInflater.from(parent.context))
        return UserVH(binding)
    }
    override fun getItemCount(): Int {
        return users.size
    }
    override fun onBindViewHolder(holder: UserVH, position: Int) {
        val user = users[position]
        holder.bind(user)
    }
}
class UserVH(private val binding: ItemUserBinding) : RecyclerView.ViewHolder(binding.root) {
    fun bind(user: User) {
        binding.userName.text = user.name
        binding.userEmail.text = user.email
        binding.userInitial.text = user.name.substring(0, 1)
    }
}
It’s pretty simple actually. Adapter updates itself whenever users property changes.
Here’s what it looks like when we run it in emulator or phone.
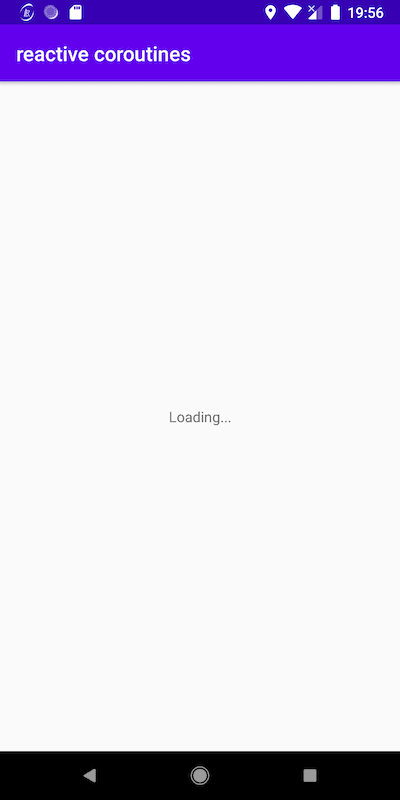
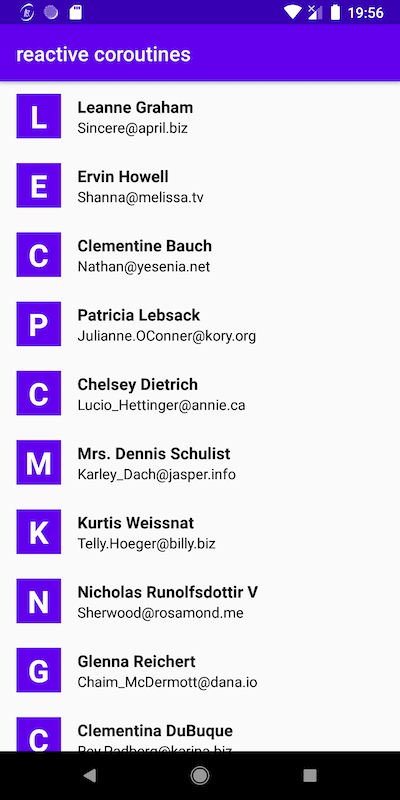
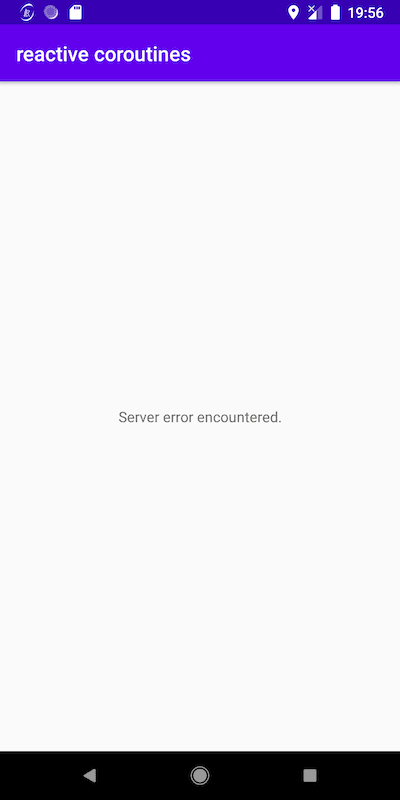
Loading, success and error states
That’s it. We have just implemented MVVM architecture using coroutines!
Happy coding! 🚀✨
Related Useful Article


Whether you need...
- *High-performing mobile apps
- *Bulletproof cloud solutions
- *Custom solutions for your business.