Getting Started with iOS Application Modularization
Background
We as a developer always want better and clearer code architecture, a project having code with better testing, and a project that builds in a minimal time, these things can be done with one magic, called Modularization.
Modularization allows us to use one created module in multiple projects or apps by separating the app into multiple modules.
What is the Modularization?
Currently, you may be wondering what is a module. So in simple terms, it is a part of the project that can be built separately and they have their targets which are called Frameworks.
The process of breaking down the codebase into small and sharable parts or modules is called modularization.
There are 3 ways to distribute modular code for iOS:
- Cocoa Touch Frameworks
- Swift packages
- Pods
The option you choose can have different implications for how your module code runs.
In this post, we are going to follow the first option. We will explore how we can divide our app into different modules like data, UI, tests, and dependencies very easily.
We will divide our implementation into 3 parts.
- Create a Monolithic app.
- Separate out the Data module.
- Separate out the UI module.
Create a Monolithic App
Let’s first add a new project as an iOS App in Xcode.
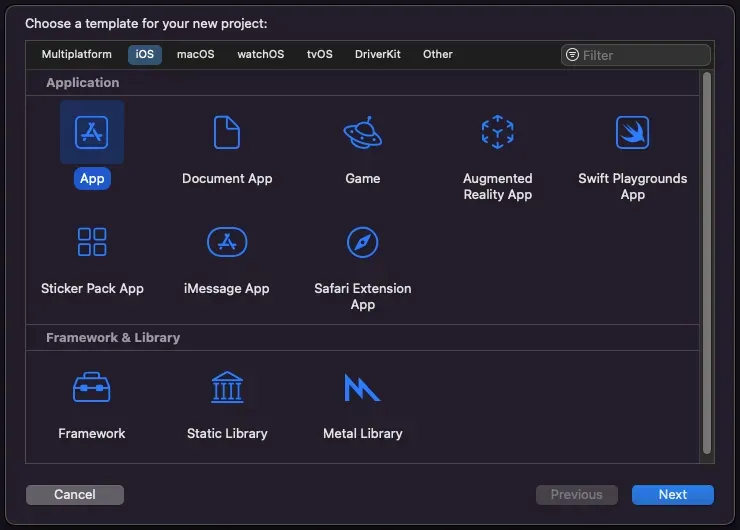
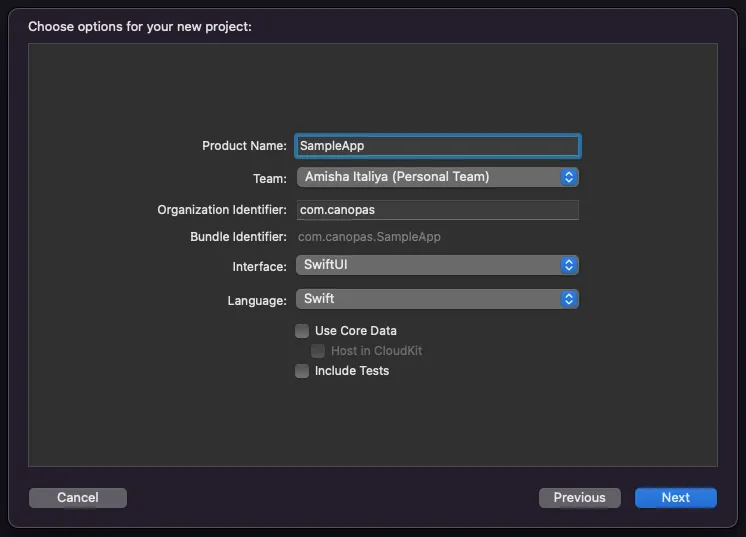
Now, let’s create our basic demo app which uses external dependencies with cocoapod and swift package manager both.
I’ve tried to include all the possible scenarios in this demo example. Like I’ve integrated the app with cocoapod and SPM libraries and also added a build run script so you all can get an idea about how to manage it if your project has a run script or structure like this.
This GitHub repo gives you a basic idea about the initial startup project’s initial app creation commit.
Separate out the Data module
After completing the creation of our demo app, which is a monolithic app, let’s start to modularize our created app by dividing it into multiple modules. We will start with the data module first.
Let’s first start with adding it as a new framework project.
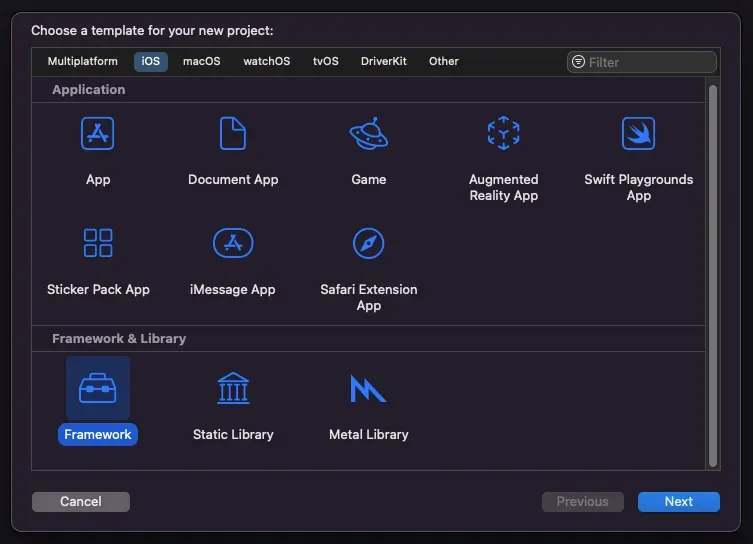
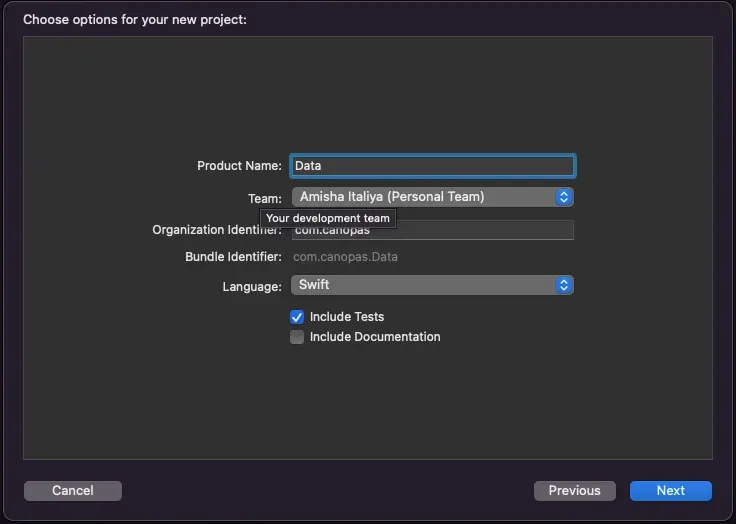
Note: We have to add all the new sub modules to the main workspace. So, Don’t forget to select the workspace name like below.

In the Data module, we can put our all services, model classes, and repositories-related files, repositories, database files, etc.
After creating the new Data module, let’s move all the files of the App data directory to the Data module.
The new directory structure will look like this.
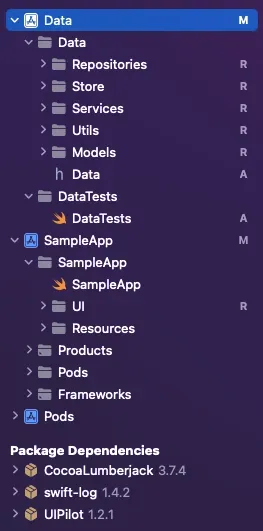
Note: You have to make sure that all files are moved to the right target otherwise data module files will not build. You can check the Target Membership option in the right panel by selecting a particular file.
Here’s a screenshot of the UserRepository file’s details.
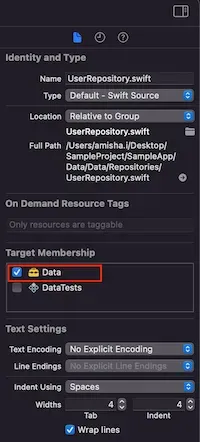
After moving all the files, you will get a bunch of errors because our root app will be not able to find those data classes.
Let’s fix them.
For that, we will have to add a Data module as an external framework to our main app.
To do that, go to the app’s target, select the General tab, and scroll to “Frameworks, Libraries, and Embedded Content”.

Now click on that + button, select Data Framework, and then select Add.
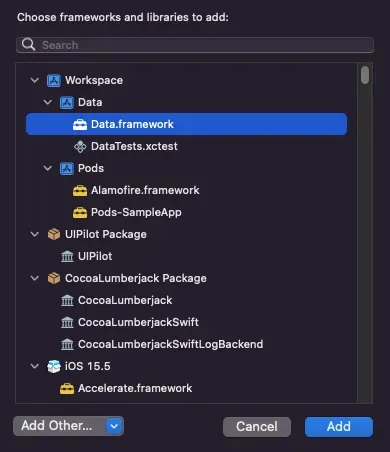
After that, you just have to import Data module in all the files where you are getting not in scope error.
One change you will have to make — Public classes, functions, and initializers. As we are using data classes outside the module now, the app target will have access to only public properties.
Cocoapods
Make those changes and, that's not enough, we still don't have the cocoapod dependency in the Data module.
For that, we have to add a configuration for the Data module target in the podfile.
The new podfile will look like this.
platform :ios, '15.5'
# Give main project path

workspace 'SampleApp.xcworkspace'
project 'SampleApp.xcodeproj'
inhibit_all_warnings!
use_frameworks!
def data_pod
   pod 'Alamofire'
   pod 'SwiftLint'
end
target 'SampleApp' do
   data_pod            // Data module dependencies
   # Here is example if you have different pod in the app
   pod 'Charts'        // App module dependencies
   pod 'RealmSwift'
end
target 'Data' do
   # Provide path for module project file
   project 'Data/Data.project'

   data_pod
end
We just added a separate pod script for our data module.
Swift packages
Now the last thing is remaining.
We also have to add SPM dependencies in the Data module which we were using in the data module files.
Here, we just need to add Cocoalumberjack library in the data module, and don’t forget to remove it from the app module.
Build/Run scripts
If your project has run the script and you have added that dependency in the other module, we will have to add that script to that module as well.
In this project, we have a run script for SwiftLint and we are also using it for the Data module then we have to add it to its run script section. And also need to add a separate .swiftlint.yml file to ignore a few lint errors and warnings, the same way we had handled them in our main app module.
Separate out the UI module
Now if you want to perform further modularization for the remaining UI part then that’s also possible.
Let’s see how it can be done.
let’s add a new UI package as a new project same as we have added the Data module in the main workspace.
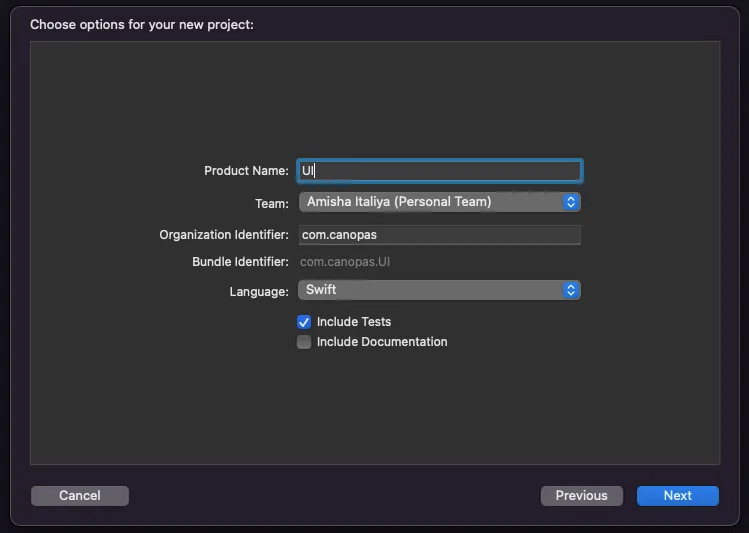
Reminder: We must have to add this new module to our created workspace. Don’t forget to select the workspace as I told you earlier.
Now let’s move all the UI-related files to the added new UI module.
After checking all files' target membership, add this module as a framework to our main app.
Now let’s add UIilot dependency into this UI framework. Note that if you are not using any pilot method in the main app module, you can remove it from the main app framework section.
After adding the UI module we also have to add changes to the podfile as we are using SwiftLint in this module, here is the new change to the podfile,
def ui_pod
   pod 'SwiftLint'
end
target 'UI' do
   # Provide path for module project file
   project 'UI/UI.project'

   ui_pod
end
Now add the run script and .swiftlint.yml file into the UI module and make all the classes and views public.
Don’t forget to add a public initializer for the added views as well otherwise, it will be not accessible for our app and will give an error.
Now, all done!
You are good to run the app by making sure that you have selected the main app in the run target.

Note:
- Earlier, we added the Data module to the main App as an embedded framework and we are also using the Data module’s class in the UI module as well so we also have to add the Data module in the UI module.
- So the main thing is that we are already using the Data module in the UI module as an embedded framework then no need to embed the Data module in the main app as an embedded framework.
- Otherwise, it will create a conflict in the bundle identifier at the time of deploying the app as we haven’t created code signing certificates for all divided modules.

You can get the final project from this GitHub repository.
We have only seen greener parts of modularization but every coin has two sides. Let’s see the benefits and drawbacks of modularization.
Benefits
Creating modularization has many advantages. For example,
- It clearly improves our code architecture.
- As we have separated our app into different parts, they can have their own unit test target and UI test target so that we can test our code in a better way.
- Only that framework will be rebuilt at the next compilation in which we have made changes. This is where our precious time will be saved. Basically, it speeds up build time.
- It also provides Encapsulation if you don’t want to share some class to any separate module.
- We can use this separate framework in another project.
Drawbacks
Here are some reasons why you should not modularise your code.
- By following the modularization your code can be a bit more complex to understand for beginners.
- Some feature developments might require changes in multiple modules. This may increase the cost of development for some features.
- Having too many dynamic frameworks can slow down the launch time of your app.
Conclusion
Frameworks are very useful, they allow us to have a clear architecture, and that’s why I was inspired to add modularization to my project.
Sometimes it’s more difficult to modularize existing apps and it gets even harder if it’s a big app. So think about it while building a new iOS app!
Related Popular Articles

