Jetpack Compose Typewriter animation with highlighted texts
Background
Typewriter animations are a great way to add some personality and interactivity to your app’s user interface. With Jetpack Compose, Google’s modern toolkit for building native Android UIs, creating typewriter animations is easier than ever.
In this blog post, we’ll show you how to use Jetpack Compose’s animation APIs to create a typewriter effect, where text appears as if it’s being typed out letter by letter. We’ll cover everything from setting up the layout to creating the animation, so whether you’re new to Jetpack Compose or a seasoned pro, you’ll be able to follow along.
The complete source code of the implementation is available on GitHub.
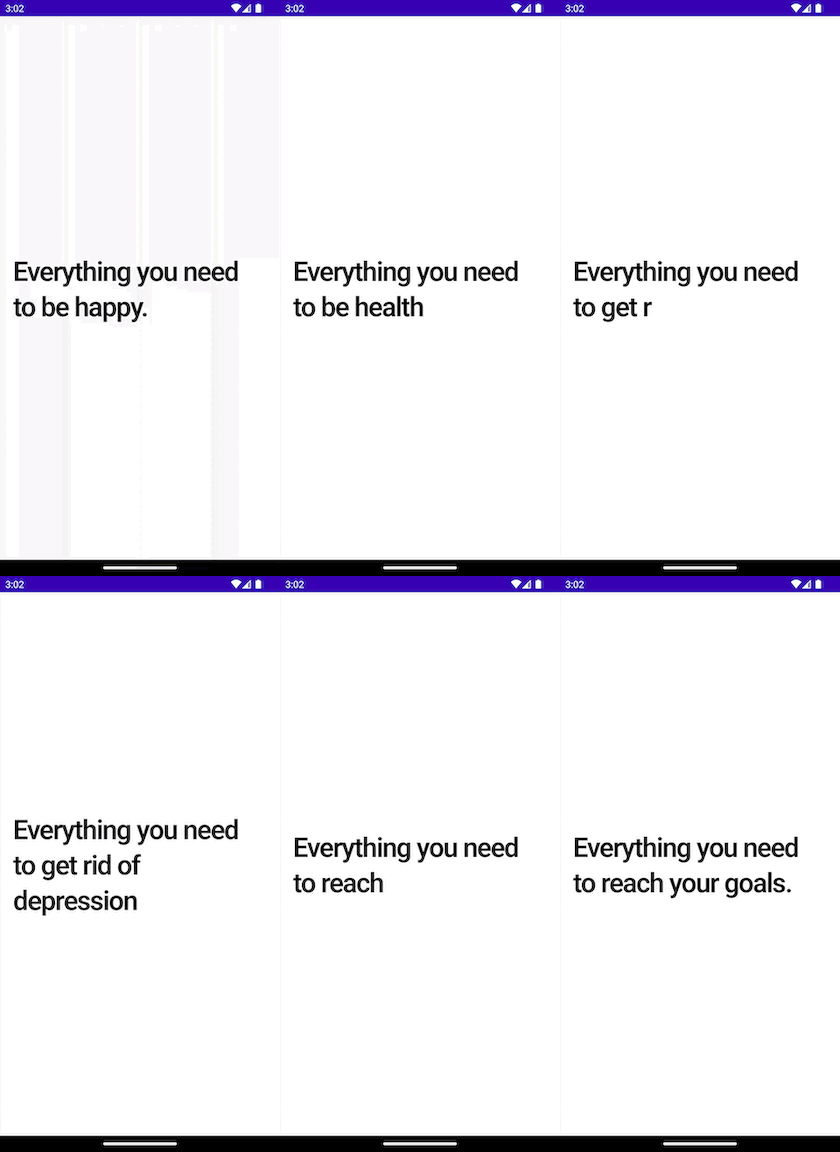
At the end of the article what we’ll have? Nice typewriter with highlights

Sponsored
We are what we repeatedly do. Excellence, then, is not an act, but a habit. Try out Justly and start building your habits today!
So let’s get started and add some life to your app’s UI with a typewriter animation!
Implement TypewriterText
Let’s start by creating a custom composable.
@Composable
fun TypewriterText(
    baseText: String,
    highlightedText: String,
    parts: List<String>
) {

  Text(
        text = "",
        style = TextStyle(
            fontWeight = FontWeight.SemiBold,
            fontSize = 40.sp,
            letterSpacing = -(1.6).sp,
            lineHeight = 52.sp
        ),
        color = Color.Black,
    )
}
It takes three parameters, baseText the main text, in our example it’s "Everything you need to" , highlightedText — the text to highlight, and parts — animated text that keeps changing.
Let’s first implement logic to have typing effect.
@Composable
fun TypewriterText(
    ...
) {

    var partIndex by remember { mutableStateOf(0) }
    var partText by remember { mutableStateOf("") }
    val textToDisplay = "$baseText $partText"

    LaunchedEffect(key1 = parts) {
        while (partIndex <= parts.size) {

            val part = parts[partIndex]

            part.forEachIndexed { charIndex, _ ->
                partText = part.substring(startIndex = 0, endIndex = charIndex + 1)
                delay(100)
            }

            delay(1000)

            partIndex = (partIndex + 1) % parts.size
        }
    }
   ....
}
Nothing fancy, easy to understand right?
partIndex keeps track of animated parts.partText is currently selected animated part text. One basic while loop to process all parts and we’re done.

Okay, great 👍.
However, we don’t want our text directly jumps to the next part. Before typing the next part, our previous text should be removed first. Let’s modify the above code slightly to have the same.
LaunchedEffect(key1 = parts) {
    while (partIndex <= parts.size) {

        val part = parts[partIndex]

        part.forEachIndexed { charIndex, _ ->
            partText = part.substring(startIndex = 0, endIndex = charIndex + 1)
            delay(100)
        }

        delay(1000)

        part.forEachIndexed { charIndex, _ ->
            partText = part
                .substring(startIndex = 0, endIndex = part.length - (charIndex + 1))
            delay(30)
        }

        delay(500)

        partIndex = (partIndex + 1) % parts.size
    }
}
Okay, now let’s see the result.

Cool 👌. And we have a nice typewriter.
Implement Text Highlights
Now let’s decorate the text to make it more eye-catchy. We’ll highlight some important parts of the text.
With Modifier.drawBehind we’ll draw lines behind the text we want to highlight, but before that, we need to find the position of the text and the bound to draw the lines.
Find the bound to draw lines
While implementing I first tried TextLayoutResult.getPathForRange() it’ll return the path that encloses the given range.
The result was not as expected when we have multiple line texts to highlight.

I came across the solution to draw the background behind selected text from StackOverflow. I just copy-pasted logic to find the bound of the selected text.
fun TextLayoutResult.getBoundingBoxesForRange(start: Int, end: Int): List<Rect> {
    var prevRect: Rect? = null
    var firstLineCharRect: Rect? = null
    val boundingBoxes = mutableListOf<Rect>()
    for (i in start..end) {
        val rect = getBoundingBox(i)
        val isLastRect = i == end

        // single char case
        if (isLastRect && firstLineCharRect == null) {
            firstLineCharRect = rect
            prevRect = rect
        }

        // `rect.right` is zero for the last space in each line
        // looks like an issue to me, reported: https://issuetracker.google.com/issues/197146630
        if (!isLastRect && rect.right == 0f) continue

        if (firstLineCharRect == null) {
            firstLineCharRect = rect
        } else if (prevRect != null) {
            if (prevRect.bottom != rect.bottom || isLastRect) {
                boundingBoxes.add(
                    firstLineCharRect.copy(right = prevRect.right)
                )
                firstLineCharRect = rect
            }
        }
        prevRect = rect
    }
    return boundingBoxes
}
It looks a bit complex initially.
Under the hood,
- We’re just finding the
rectof each character in a given range usinggetBoundingBox(i) - If we have multiline text in a given range, it’ll return number boxes based on the lines.
Let’s use the above extension function and find a list of rect to draw in onTextLayout callback. here’s how.
val highlightStart = baseText.indexOf(highlightText)

Text(
....
onTextLayout = { layoutResult ->
    val start = baseText.length
    val end = textToDisplay.count()
    selectedPartRects = if (start < end) {
        layoutResult.getBoundingBoxesForRange(start = start, end = end - 1)
    } else { emptyList() }

    if (highlightStart >= 0) {
        selectedPartRects = selectedPartRects + layoutResult
            .getBoundingBoxesForRange(start = highlightStart,
                end = highlightStart + highlightText.length
            )
    }
})
Draw lines behind the text
Now we have a number of rect let’s draw the line with Modifier.drawBehind{}
modifier = Modifier.drawBehind {
    val borderSize = 20.sp.toPx()

    selectedPartRects.forEach { rect ->
        val selectedRect = rect.translate(0f, -borderSize / 1.5f)
        drawLine(
            color = Color(0x408559DA),
            start = Offset(selectedRect.left, selectedRect.bottom),
            end = selectedRect.bottomRight,
            strokeWidth = borderSize
        )
    }
}
Nothing fancy right? We want our rect to look like an underline, we slightly translate it.
And our final TypewriterText look something like this,
@Composable
fun AnimateTypewriterText(baseText: String, highlightText: String, parts: List<String>) {

    val highlightStart = baseText.indexOf(highlightText)
    var partIndex by remember { mutableStateOf(0) }
    var partText by remember { mutableStateOf("") }
    val textToDisplay = "$baseText$partText"
    var selectedPartRects by remember { mutableStateOf(listOf<Rect>()) }

    LaunchedEffect(key1 = parts) {
        while (partIndex <= parts.size) {
            val part = parts[partIndex]
            part.forEachIndexed { charIndex, _ ->
                partText = part.substring(startIndex = 0, endIndex = charIndex + 1)
                delay(100)
            }
            delay(1000)
            part.forEachIndexed { charIndex, _ ->
                partText = part
                    .substring(startIndex = 0, endIndex = part.length - (charIndex + 1))
                delay(30)
            }
            delay(500)
            partIndex = (partIndex + 1) % parts.size
        }
    }

    Text(
        text = textToDisplay,
        style = AppTheme.typography.introHeaderTextStyle,
        color = colors.textPrimary,
        modifier = Modifier.drawBehind {
            val borderSize = 20.sp.toPx()
            selectedPartRects.forEach { rect ->
                val selectedRect = rect.translate(0f, -borderSize / 1.5f)
                drawLine(
                    color = Color(0x408559DA),
                    start = Offset(selectedRect.left, selectedRect.bottom),
                    end = selectedRect.bottomRight,
                    strokeWidth = borderSize
                )
            }
        },
        onTextLayout = { layoutResult ->
            val start = baseText.length
            val end = textToDisplay.count()
            selectedPartRects = if (start < end) {
                layoutResult.getBoundingBoxesForRange(start = start, end = end - 1)
            } else {
                emptyList()
            }

            if (highlightStart >= 0) {
                selectedPartRects = selectedPartRects + layoutResult
                    .getBoundingBoxesForRange(
                        start = highlightStart,
                        end = highlightStart + highlightText.length
                    )
            }
        }
    )
}
And the result is here,

That’s it, we’re done with implementation 👏.
The complete source code of the above implementation is available on Github
Conclusion
I hope this tutorial on creating typewriter animations using Jetpack Compose was helpful and informative. By following the steps outlined in this post, you can add an engaging and interactive element to your app’s UI, making it more user-friendly and fun to use.
You can use this animation to showcase different features of your application, for example, check out the app — Justly, which used the same animation to introduce users to the app features.
Thank you!!
Related articles

