Golang: Serverless deployment using AWS Cloudformation
Introduction
Getting rid of servers is a lifesaver remedy. Ultimately, it saves you from all the server management headaches that come with managing servers.
On the other hand, serverless architectures automatically scale up and down without needing our concerns. So basically, you just need to write the code and let the cloud handle the rest!
Serverless architectures are easy to use, but ever think how you can deploy them quickly too? AWS Cloudformation takes the lead for it.
Sponsored
We are what we repeatedly do. Excellence, then, is not an act, but a habit. Try out Justly and start building your habits today!
Prerequisites
- IAM user — to perform AWS CLI operations on our behalf.
- S3 bucket — to upload a zip of our code.
IAM user permissions
We need to provide an agreement to our IAM user on whether it will be able to create and manage specific services on our behalf or not.
Cloudformation will use the same user to access all the required AWS services for creating a serverless deployment stack.

Add the above-mentioned permissions to your IAM user, if not given already.
Introduction to AWS Lambda and API Gateway
AWS Lambda and API Gateway are the main AWS services, we will need for running our code with serverless architecture.
If you’re not familiar with the term serverless or AWS lambda, consider referring to Serverless microservices using AWS Lambda and API Gateway.
Introduction to Cloudformation
AWS Cloudformation is a service that allows you to deploy your applications without worrying about infrastructure.
AWS Lambda manages your code on behalf of you!
While choosing serverless architecture, we need to create an AWS Lambda function and API Gateway of our own, and the rest of the things are handled by lambda.
AWS Cloudformation manages Lambda deployment on your behalf!
While using Cloudformation, we don’t need to manage lambda and API Gateway creation by ourselves. Cloudformation takes care of it all.
However, AWS Cloudformation also works with servers and manages all the infrastructure in a pretty good way.
Configure AWS CLI with IAM user
For Creating a lambda function we need to make a zip of our code and put it into s3.
Install aws-cli on your machine and execute the following commands to set up AWS CLI operations.
- aws configure set aws_access_key_id your_aws_acces_key_id
- aws configure set aws_secret_access_key your_aws_secret_access_key
- aws configure set region your_aws_region
- aws s3 cp test_lambda.zip s3://your_aws_bucket
Here, test_lambda.zip is our code, which we want to run by AWS Lambda(serverless architecture). The cp command will copy the zip file to your lambda bucket.
Create Cloudformation stack using AWS CLI
As we have our code handy at s3, let’s address it and create a Clouformation stack.
But, wait! Before creating the stack directly I would recommend validating the template, that we will use for stack creation.
Validate Cloudformation template
- aws cloudformation validate-template --template-body file://serverless_deployment.ymlAfter a successful validation check, let’s create a stack. If any misconfiguration will be there validation will be failed with errors.
Create Cloudformation stack using AWS CLI
- aws cloudformation deploy --stack-name test-lambda-stack --template-file serverless_deployment.yml --parameter-overrides AwsRegion=aws_region AwsAccessKeyId=your_aws_access_key_id
          AwsSecretAccessKey=your_aws_secret_access_key
          LambdaBucket=lambda-test-bucket-006 LambdaUrl=test_lambda.zip
          ApiGatewayStageName=prod --capabilities CAPABILITY_IAM CAPABILITY_NAMED_IAM
- stack-name: A name of the stack we want to create(custom).
- template-file: Path of the Cloudformation template
- parameter-overrides: Parameters we want to override in the Cloudformation template
- capabilities: A list of capabilities required to permit AWS Cloudformation to create certain resources like IAM.
Visit Cloudformation stack deploy using AWS CLI for more information.
However, we can also use cloudformation create-stack command for stack creation, but this won’t allow updating our stack. It will delete first the older one and then create a new one in case of recreation.
Whilst, deploy command takes care of creating and updating on its own.
Get familiar with the Cloudformation template
A template is a JSON-or-YAML-formatted text file that describes our AWS infrastructure. Visit Template anatomy for more detail on Cloudformation template structure.
Among all sections of the Cloudformation template, Resources are the most important and required ones.
AWS Cloudformation template allows us to create almost every type of resource using the template.
We will discuss more of our usage: Lambda and API Gateway
Note: We will go with YAML formatted template in this blog.
Create AWS Lambda Execution Role
Let’s create a Lambda execution role, that is required to develop the Lambda function.
Basically, Clouformation creates resources from the Resources attributes of the template and gives outcomes as Outputs attributes of the template.
AWSTemplateFormatVersion: 2010-09-09
Description: Deploy serverless demo application.

Resources:
  LambdaExecutionRole:
    Type: AWS::IAM::Role
    Properties:
      RoleName:
        Fn::Sub: "test-lambda-role"
      AssumeRolePolicyDocument:
        Version: 2012-10-17
        Statement:
        - Effect: "Allow"
          Principal:
            Service:
            - "lambda.amazonaws.com"
          Action: "sts:AssumeRole"
      ManagedPolicyArns:
      - "arn:aws:iam::aws:policy/AWSLambdaExecute"
      - "arn:aws:iam::aws:policy/AmazonS3FullAccess"
      - "arn:aws:iam::aws:policy/AmazonDynamoDBFullAccess"
      - "arn:aws:iam::aws:policy/AmazonKinesisFullAccess"
      Path: "/"

Outputs:
  LambdaRoleARN:
      Description: Role for Lambda execution.
      Value:
        Fn::GetAtt:
          - LambdaExecutionRole
          - Arn
      Export:
        Name:
          Fn::Sub: "test-lambda-role"
In the above snippet, we added the Resources attribute and mentioned we want to create LambdaExecutionRole(you can choose your favorite one!).
Resource:
- LambdaExecutionRole — A Lambda execution role resource name(custom).
- AWS::IAM::Role — it represents the type of resource we want to create(just like a type of variable), it will be different for different resources.
- Properties — it gives several options like RoleName, RoleArn, AssumeRolePolicyDocument, ManagePolicyArns etc.
Explore more at Cloudformation IAM Role template format for more details.
Output:
In the Outputs section, we have added LambdaRoleARN, which will be the ARN(URL) of the created lambda role that we have applied using the Resources stage.
- Description — it shows the description of specific output.
- Value — It’s the value of the created role using the resource, which we can get using the intrinsic function Fn::GetAtt using the logical name of Resource(LambdaExecutionRole in our case).
- Export — how it will be displayed in AWS Cloudformation stack output(choose your favorite one!).
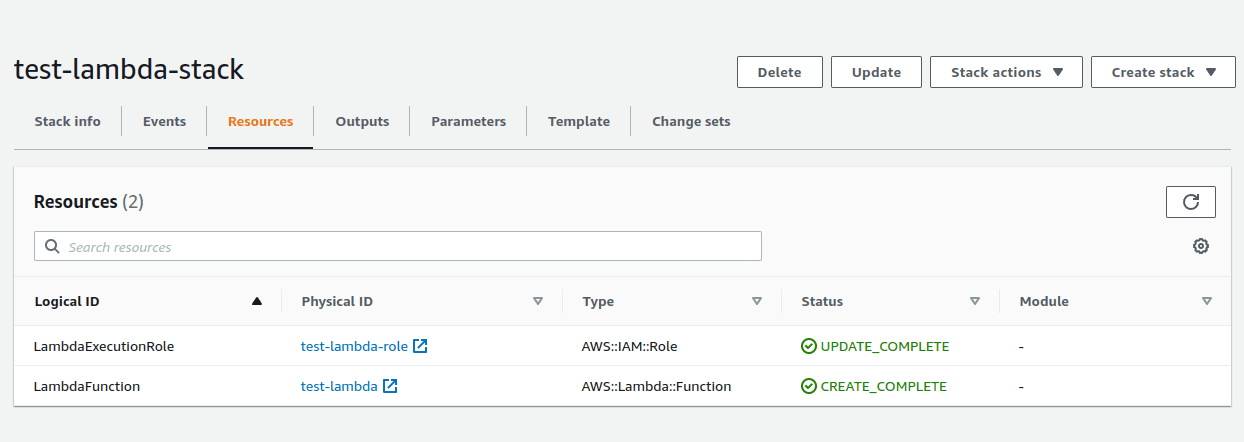
After running the AWS CLI command to create the Clouformation stack, you should see the created resource and output in the AWS console like below.


Create AWS Lambda function using Cloudformation
Let’s create a Lambda function, that is required to run or code without setting up the development environment.
As we have seen in the creation of the LambdaExecutionRole, we will need resources and outputs for Lambda, too.
Resources:
  LambdaFunction:
    Type: AWS::Lambda::Function
    Properties:
      FunctionName:
        Fn::Sub: "test-lambda"
      Description: Demo LambdaFunction for learning using cloudformation
      Runtime: "go1.x"
      Code:
        S3Bucket: your_s3_bucket_name
        S3Key: !Ref your_lambda_handler_name
      Handler: main
      MemorySize: 128
      Timeout: 10
      Role: !GetAtt LambdaExecutionRole.Arn
      Environment:
        Variables:
          ACCESS_KEY_ID:
            Fn::Sub: your_aws_secret_key_id
          SECRET_ACCESS_KEY:
            Fn::Sub: your_aws_secret_access_key
          REGION_AWS:
            Fn::Sub: your_aws_region
GIN_MODE: release- LambdaFunction — A Lambda function resource name(custom).
- AWS::Lambda::Function — It’s the default type for creating a lambda function.
- Properties — it consists of several entities like FunctionName, Runtime, Code, Handler, Role, Environment, etc.
If you want to connect your lambda function to RDS or some other services which use VPC(like EC2). You need to provide an additional attribute named VpcConfig while creating a lambda function.
Visit the AWS Lambda function template Cloudformation to get deeper details.
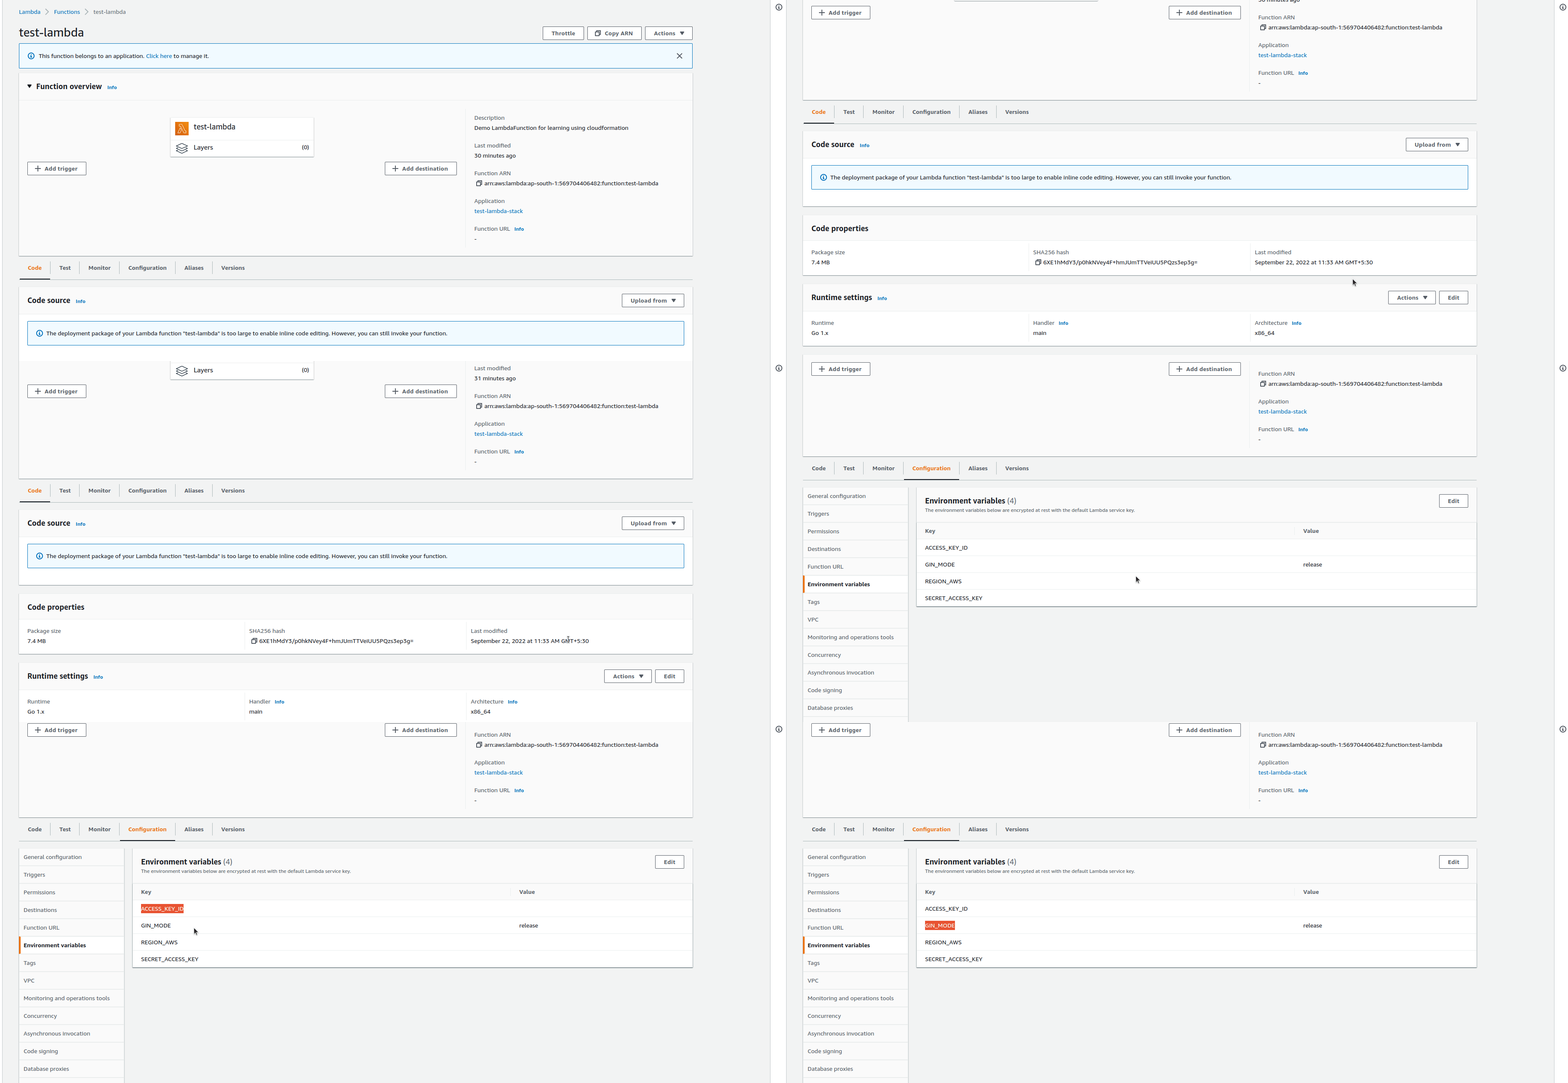
After adding the Lambda function as resource and output, you will see
- The LambdaExeutionRole and LambdaFunction are in the resources section.
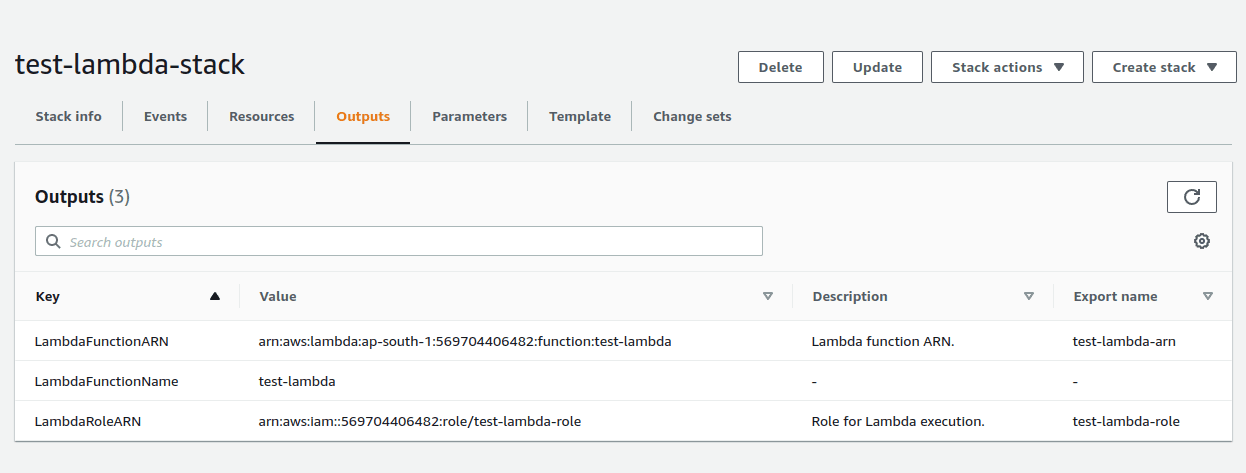
- The LambdaRoleARN, LambdaFunctionName and LambdaFunctionARN in Outputs sections of test-lambda-stack.
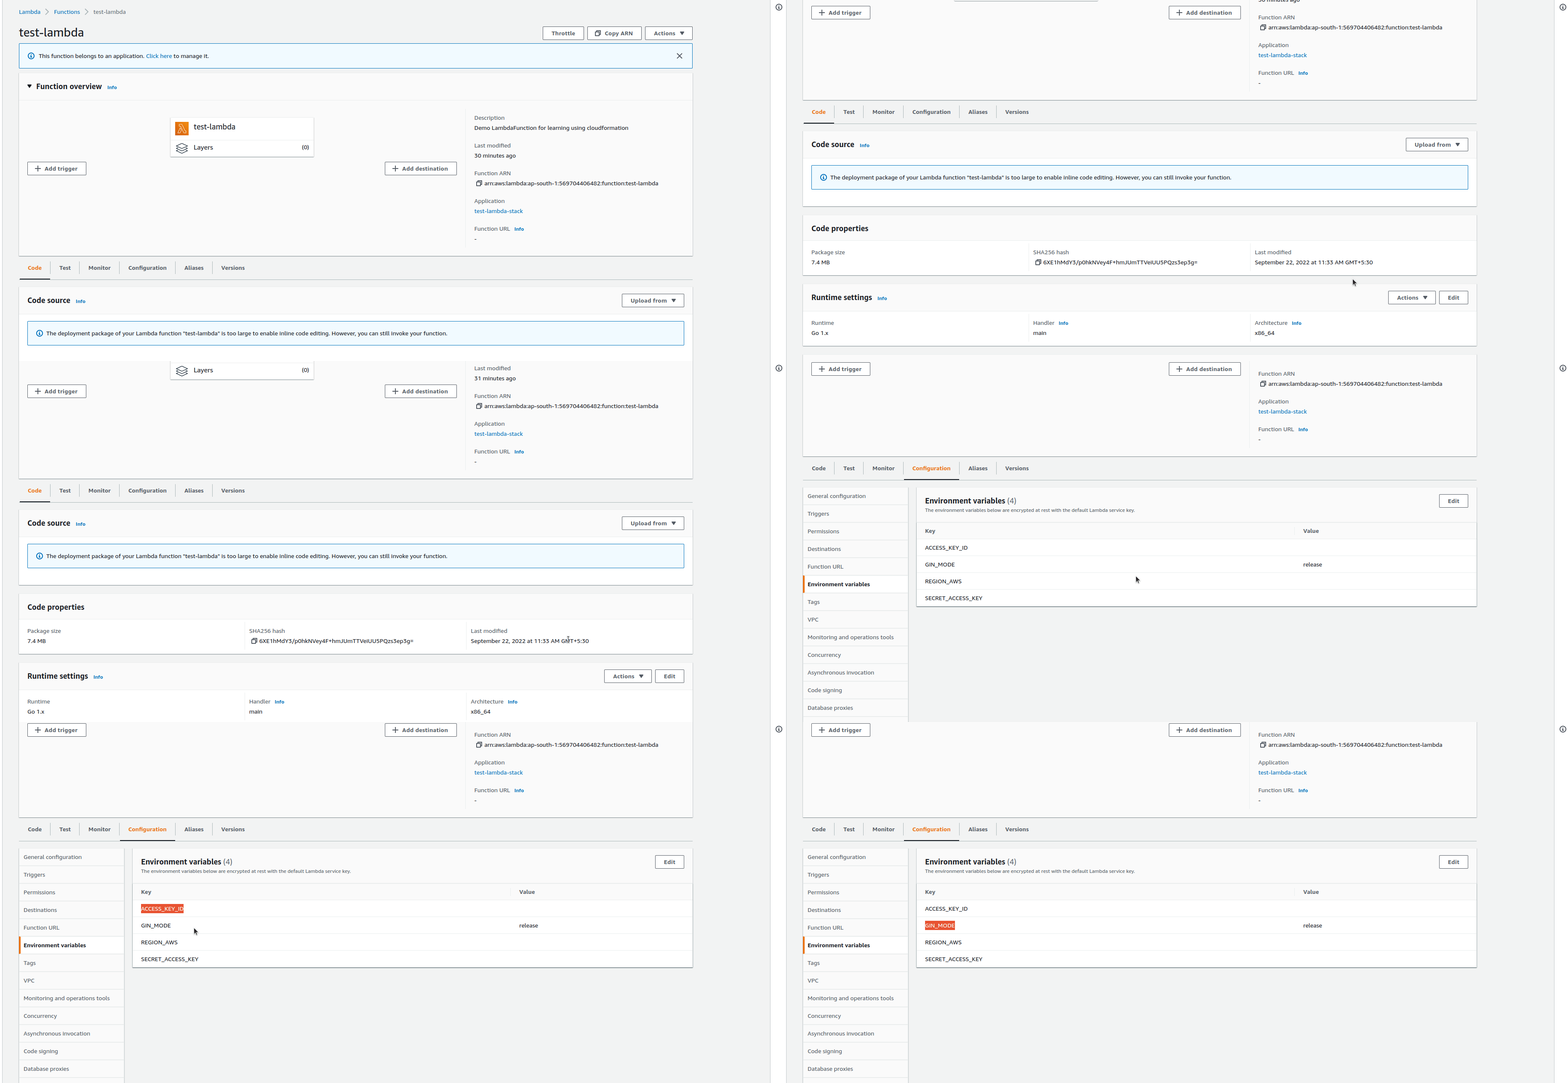
And the final output you can see, the Cloudformation stack has created a lambda function for you🎉.
Create API Gateway resource using Cloudformation
Now as we already created a lambda function, it’s time to integrate it with API Gateway.
Let’s create an API gateway resource using Cloudformation.
Resources:
  ApiGateway:
    Type: AWS::ApiGateway::RestApi
    Properties:
      Description: test API Gateway
      EndpointConfiguration:
        Types:
          - REGIONAL
      BinaryMediaTypes: ['*/*']
      DisableExecuteApiEndpoint: false
      MinimumCompressionSize: 100
      Name: test-API

Outputs:
  ApiGatewayInvokeURL:
Value: !Sub https://${ApiGateway}.execute-api.${AWS::Region}.amazonaws.com/${ApiGatewayStageName}- ApiGateway — A name for API gateway resource.
- AWS::ApiGateway::RestApi — It’s the default type for creating an API Gateway.
- Properties — It consists of several attributes like Description, EndpointConfiuration, Name, DisableExecuteApiEndpoint, etc.
Notes:
- If you add
DisableExecuteApiEndpoint: true, the endpoint returned by API Gateway(default) won’t work. So, if you want to integrate a custom domain with API gateway, you can make it true otherwise it should be false. - If you want the API Gateway should respond to all kinds of files like .png or .jpg you just need to provide the BinaryMediaTypes field.
Refer API Gateway RestAPI template for more details.
Create API Gateway method, resource, and proxy using Cloudformation
We have already created API Gateway, now it’s time to saturate it with required details like root method and proxy method.
API Gateway Method
Resources:
  ApiGatewayRootMethod:
    Type: AWS::ApiGateway::Method
    Properties:
      AuthorizationType: NONE
      HttpMethod: ANY
      Integration:
        IntegrationHttpMethod: POST
        Type: AWS_PROXY
        Uri: !Sub
          - arn:aws:apigateway:${AWS::Region}:lambda:path/2015-03-31/functions/${lambdaArn}/invocations
          - lambdaArn: !GetAtt LambdaFunction.Arn
      ResourceId: !GetAtt ApiGateway.RootResourceId
RestApiId: !Ref ApiGateway- ApiGatewayRootMethod — It’s the name of the API Gateway resource
- AWS::ApiGateway::Method — API Gateway methods that define the parameters and body that clients must send in their requests
- Properties — It consists of several attributes like AuthorizationType, HTTPMethod, Integration, RestApiId, etc.
Visit the API Gateway Method template for more information about the API Gateway method.
API Gateway Resource
Resources:
  ApiGatewayRootResource:
    Type: AWS::ApiGateway::Resource
    DependsOn:
      - ApiGatewayRootMethod
    Properties:
      RestApiId: !Ref ApiGateway
      ParentId: !GetAtt ApiGateway.RootResourceId
PathPart: '{proxy+}'- ApiGatewayRootResource — API Gateway resource name.
- AWS::ApiGateway::Resource — It creates a resource for an API.
- Properties — It consists of properties like RestApiId, ParentId, PathPart, etc.
Visit the API Gateway Resource template for more details.
AWS Lambda proxy method
Resources:
  ApiGatewayResourceProxyMethod:
    Type: AWS::ApiGateway::Method
    DependsOn:
      - ApiGatewayRootResource
    Properties:
      AuthorizationType: NONE
      HttpMethod: ANY
      Integration:
        IntegrationHttpMethod: POST
        Type: AWS_PROXY
        Uri: !Sub
          - arn:aws:apigateway:${AWS::Region}:lambda:path/2015-03-31/functions/${lambdaArn}/invocations
          - lambdaArn: !GetAtt LambdaFunction.Arn
      ResourceId: !Ref ApiGatewayRootResource
      RestApiId: !Ref ApiGateway
It’s used to enable APIs to call a Lambda function with a single integration setup on a catch-all ANY method. For example,
CRUD operations consist of multiple request methods such as POST, GET, PUT, and DELETE and we don’t need to specify all of them to invoke our lambda.
Proxy handles all the methods by itself!
Visit the API Gateway Method template for more information about the API Gateway method.
After Adding the above-mentioned Resources, you will see the newly created resources in the resources tab of Cloudformation.

Create a Lambda permission to grant API Gateway permission to invoke the Lambda function using Cloudformation
Now, as we are already done with the API Gateway configuration.
Let’s permit our API Gateway to invoke the earlier created Lambda function and deploy it.
Resources:
  LambdaApiGatewayInvoke:
    Type: AWS::Lambda::Permission
    Properties:
      Action: lambda:InvokeFunction
      FunctionName: !GetAtt LambdaFunction.Arn
      Principal: apigateway.amazonaws.com
      SourceArn: !Sub arn:aws:execute-api:${AWS::Region}:${AWS::AccountId}:${ApiGateway}/*/*/*

  ApiGatewayDeployment:
    Type: AWS::ApiGateway::Deployment
    DependsOn:
      - ApiGatewayResourceProxyMethod
    Properties:
      RestApiId: !Ref ApiGateway
StageName: !Ref ApiGatewayStageName- LambdaApiGatewayInvoke — A name of Lambda function permission resource.
- AWS::Lambda::Permission — It grants an AWS service or another account permission to use a function.
- Properties — It consists of attributes like Action, FucntionName, Principal, SourceArn, etc.
- ApiGatewayDeployment — A name of API Gateway deployment resource.
- AWS::ApiGateway::Deployment — It deploys an API Gateway
RestApiresource to a stage so that clients can call the API over the internet - Properties — It consists of attributes like RestApiId, StageName, etc.
Visit Lambda Invoke Permission and API Gateway Deployment for more information.
After adding lambda invoke permission and deploying API Gateway, you will see the newly added resources in the console.
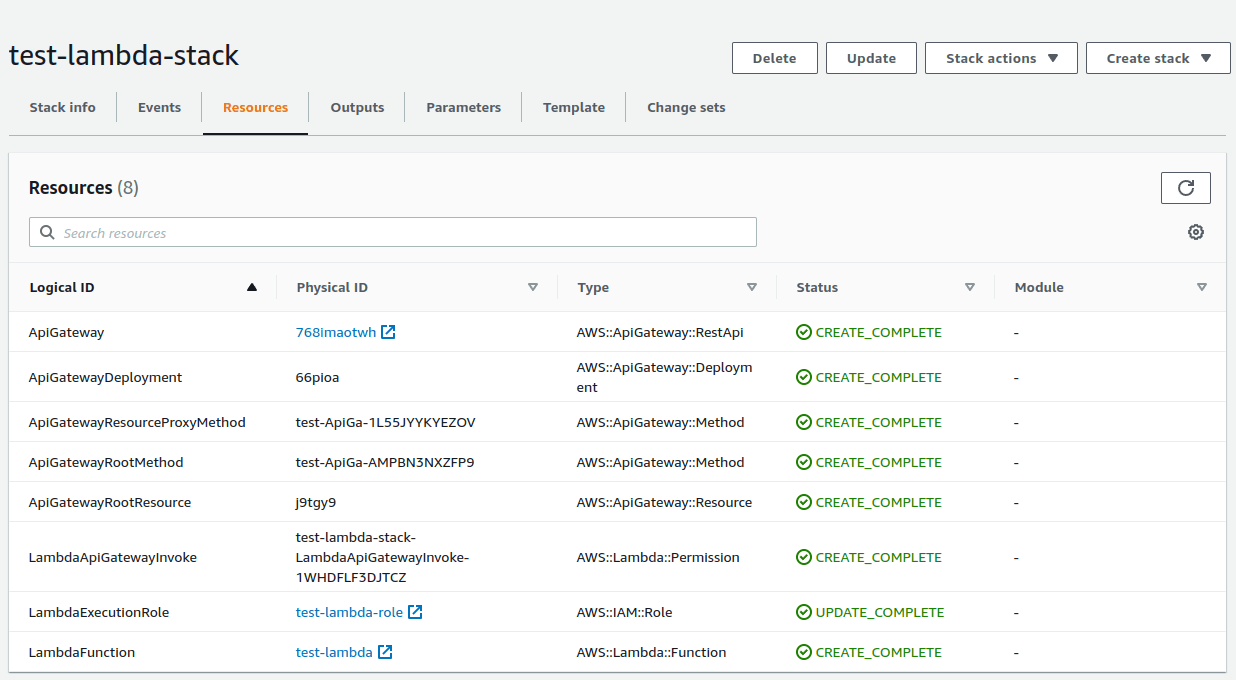
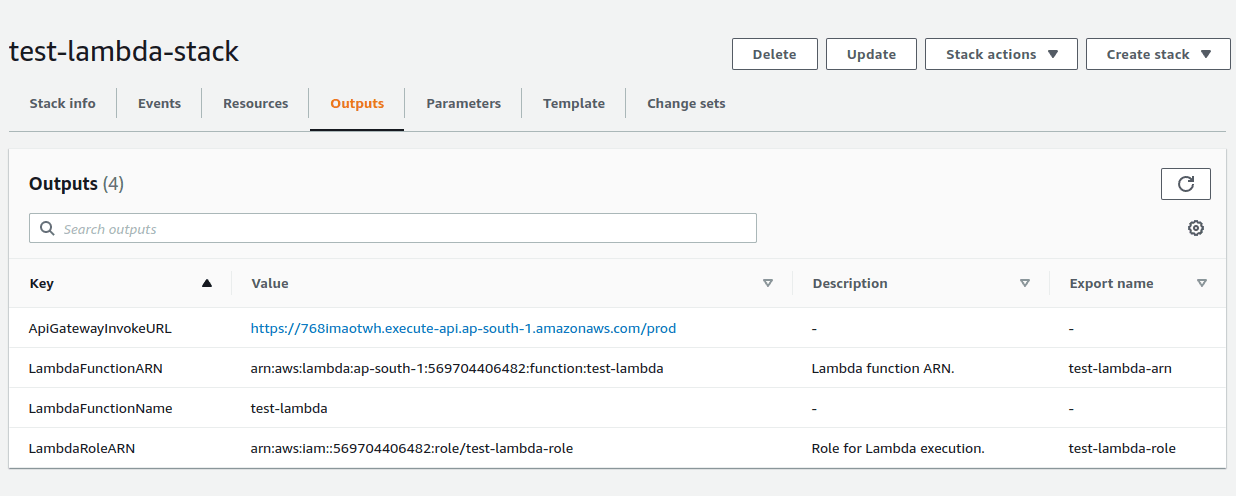
Invoke the ApiGatewayInvokeURL along with your application route and you will see your lambda responded!🎊
Configure custom domain to access API Gateways using Cloudformation(optional)
By default, API Gateway provides a default route using which we can access our application routes, but it keeps changing on every deployment.
Hence, we need to bind it with the custom domain, which will remain constant, doesn’t matter API gateway changes though.
Resources:
  ApiGatewayCustomDomainMapping:
    Type: AWS::ApiGateway::BasePathMapping
    DependsOn:
      - ApiGatewayDeployment
    Properties:
      DomainName: !Ref CustomDomainName
      RestApiId: !Ref ApiGateway
Stage: !Ref ApiGatewayStageName- ApiGatewayCustomDomainMapping — A name for custom domain mapping resource.
- AWS::ApiGateway::BasePathMapping — It creates a base path that clients who call your API must use in the invocation URL
- Properties — It consists of attributes such as DomainName, RestApiId, and Stage.
Refer CustomDomain mapping template and API Gateway Custom domain mapping for more details.
Finishing Up!
Last but not least, Cloudformation works a way better to automate any AWS service deployments like EC2, IAM, and many more.
If you want to refer to the full code, it’s available at serverless deployment using Cloudformation with GitLab CI integration.
Keep automating!!
Similar Popular Articles

