Golang: Serverless Microservices with gin
Introduction
Building complex applications can be a challenge, especially when it comes to scalability and maintainability. Golang, a powerful and concise language, paired with the flexible Gin framework, offers a perfect solution for crafting serverless microservices.
In this blog, we’ll see how to implement serverless microservices in Golang with gin, AWS Lambda, and API Gateway.
Sponsored
We are what we repeatedly do. Excellence, then, is not an act, but a habit. Try out Justly and start building your habits today!
I’m considering that you have a rough idea about serverless microservices, AWS Lambda function, and API Gateway, and if not, you can read more about it here. If you don’t have an AWS account already set up, create one.
To demonstrate serverless microservices, we’ll need to set up the following things.
- Lambda function ( which will be a compressed file of Go binary )
- API Gateway
By using the following code you can run the API in both the environments in AWS and local machine as well. Let’s first create a Lambda function in Golang.
main.go
package main

import (
   "fmt"
   "github.com/apex/gateway"
   "github.com/gin-gonic/gin"
   "log"
   "net/http"
   "os"
)

func inLambda() bool {
   if lambdaTaskRoot := os.Getenv("LAMBDA_TASK_ROOT"); lambdaTaskRoot != "" {
      return true
   }
   return false
}

func setupRouter() *gin.Engine {

   r := gin.Default()

   r.GET("/hello-world", func(c *gin.Context) {
      c.JSON(http.StatusOK, gin.H{"message": "hello test completed successfully"})
   })

   return r
}

func main() {
   if inLambda() {
      fmt.Println("running aws lambda in aws")
      log.Fatal(gateway.ListenAndServe(":8080", setupRouter()))
   } else {
      fmt.Println("running aws lambda in local")
      log.Fatal(http.ListenAndServe(":8080", setupRouter()))
   }
}- LAMBDA_TASK_ROOT is the variable that contains the path to your Lambda function code. It will be empty if you are running the project in your local environment.
- inLambda() will decide whether to execute a function in AWS or in locally.
Have a look at here for demonstration code.
It’s time to create a binary from main.go, use the below command to generate it.
GOOS=linux GOARCH=amd64 go build -o main main.go
You will find a binary named main in the project structure. To compress it execute the following command. The reason for compressing the binary file is that the AWS Lambda function only accepts files up to the size of 50MB, which normally gets exceeded in the case of a large application.
zip lambda.zip main
you will find lambda.zip created inside your project directory.
By running go run main.go you will see the server running at port 8080. you can verify lambda running in local by calling /hello-world endpoint.
Let’s create a lambda function using the AWS console. Select Go 1.x as runtime.
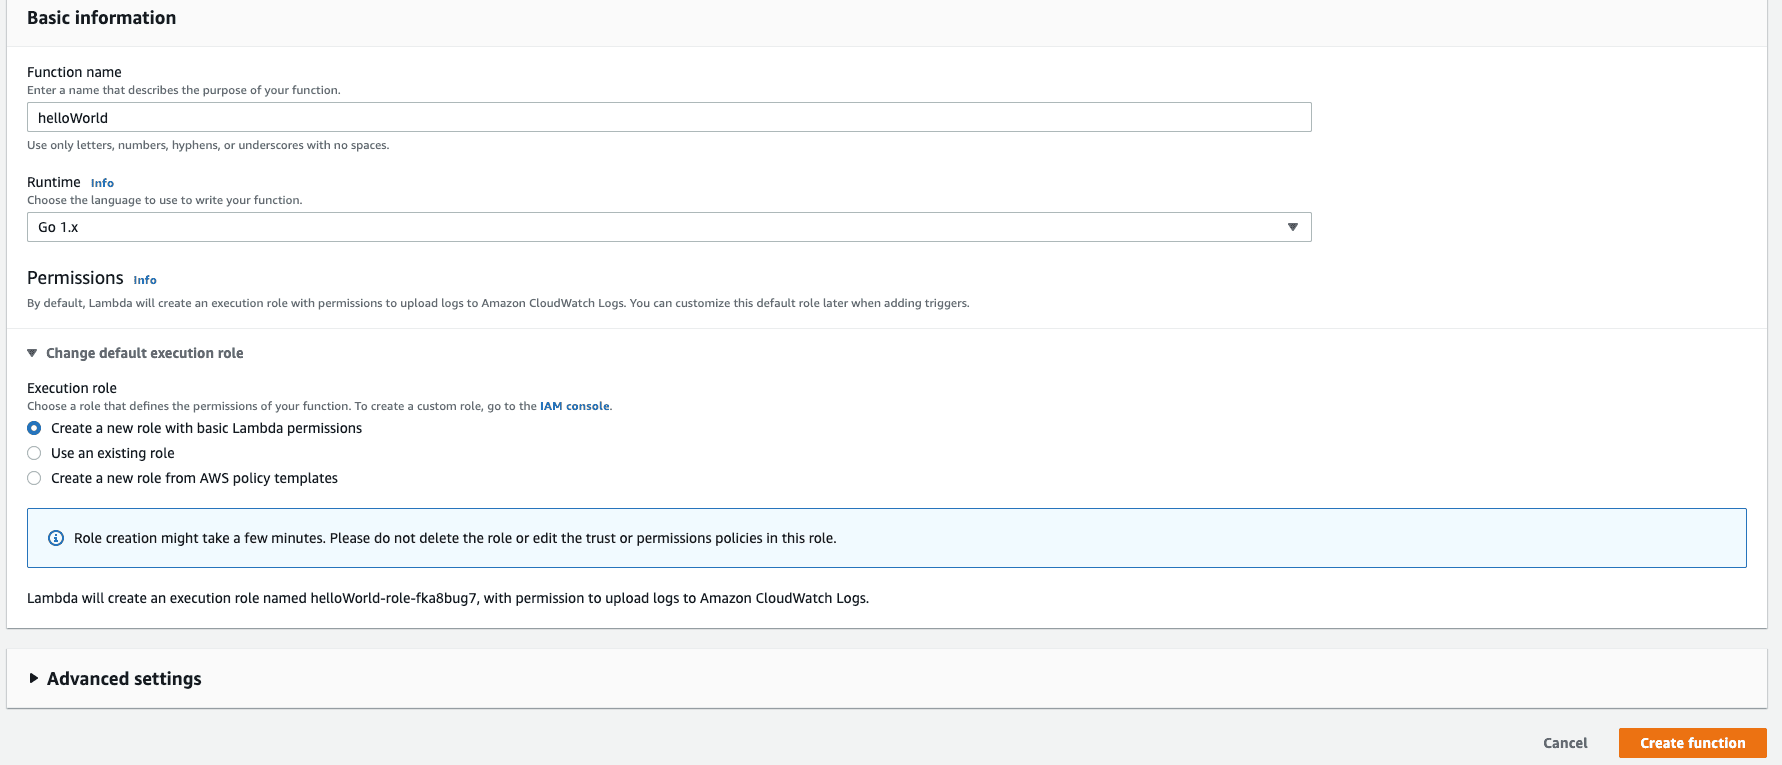
You can either choose to create a new role for lambda or can use an existing one. Kindly refer to this to know how to create a lambda basic execution role.
Now attach the compressed binary file to the lambda function shown below, we have two options available here, we can either upload the zip file directly or use S3 for uploading the compressed file to a lambda function, direct upload is a suitable option for files lesser than 10MB. otherwise, S3 is good to go.
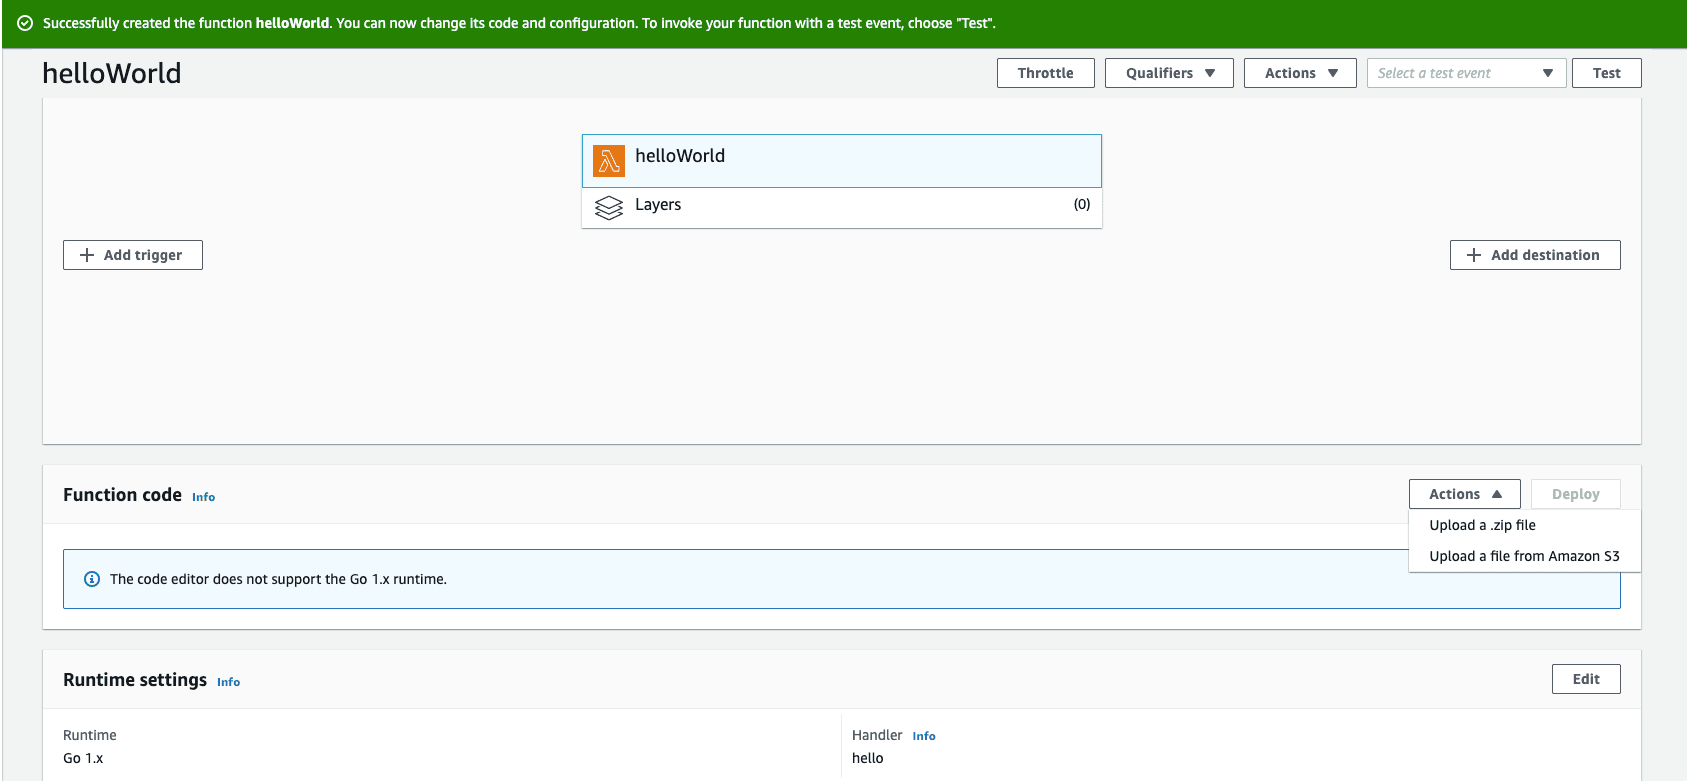
If you are using the Upload a file from Amazon S3 option, first you need to upload the file to S3 and then add the URL of it to the lambda function.

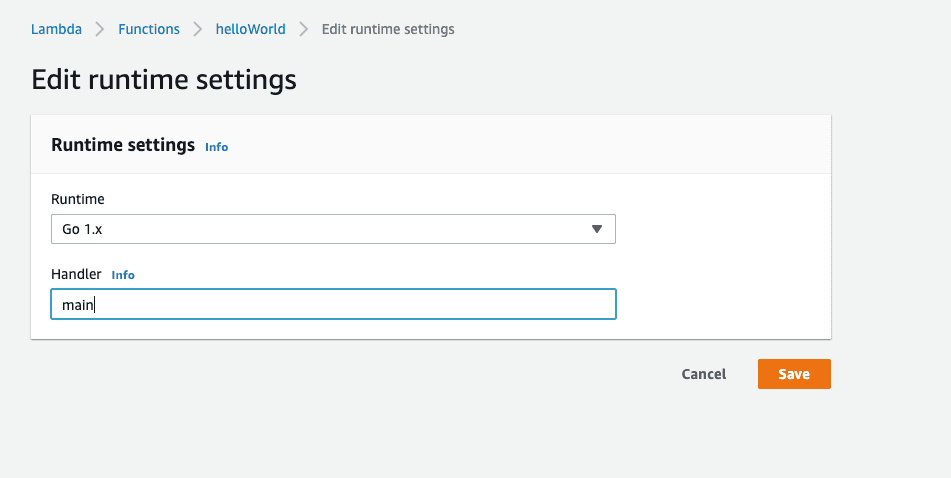
Don’t forget to change the handler name, I have used main as a lambda handler so I’m updating the handler name to main.
Now, the lambda function is completed with code. It’s time to create an API for calling our lambda. Go to AWS console ->services -> API Gateway. Choose Create API. Choose the REST API option and you will see the Create new API screen same as below, fill in the required information accordingly, and create API.


Once API gets created, attach the lambda function to it, the procedure is shown in the below screenshots.
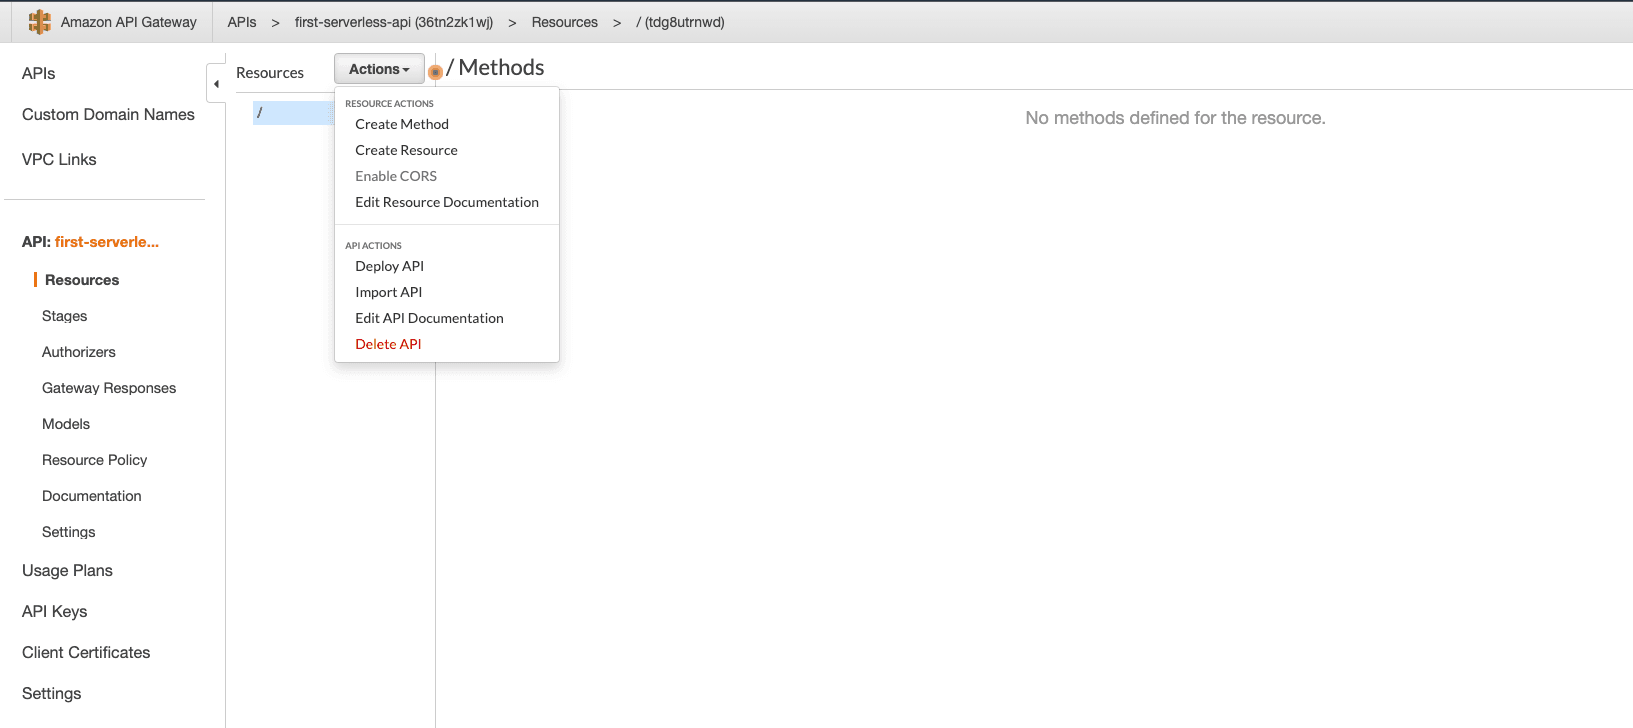
Choose the Create Resource option from Actions.

Here I used {proxy+} as a resource path, which is used for executing multiple endpoints using a single lambda function, you can read more about proxy here.

It’ll ask for adding permission to the lambda function to call it from API Gateway. Give permission and you are done with basic serverless microservice using Golang and gin! Let’s test it’s working.
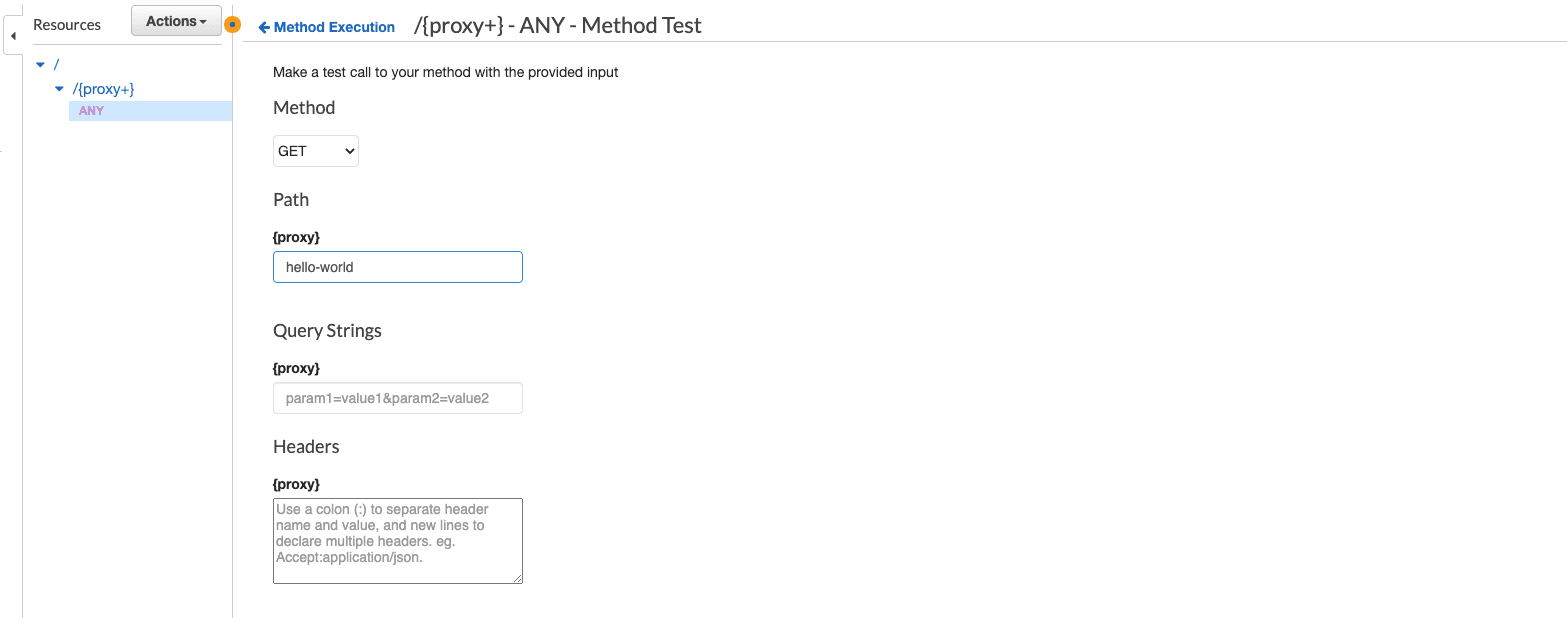
We have added the GET endpoint named /hello-world in our lambda. so, the path will contain the same endpoint and GET as Method. Extra query string params and headers can be passed in Query strings and Headers field respectively if any. Clicking on Test will let you to the output of the lambda function as following.
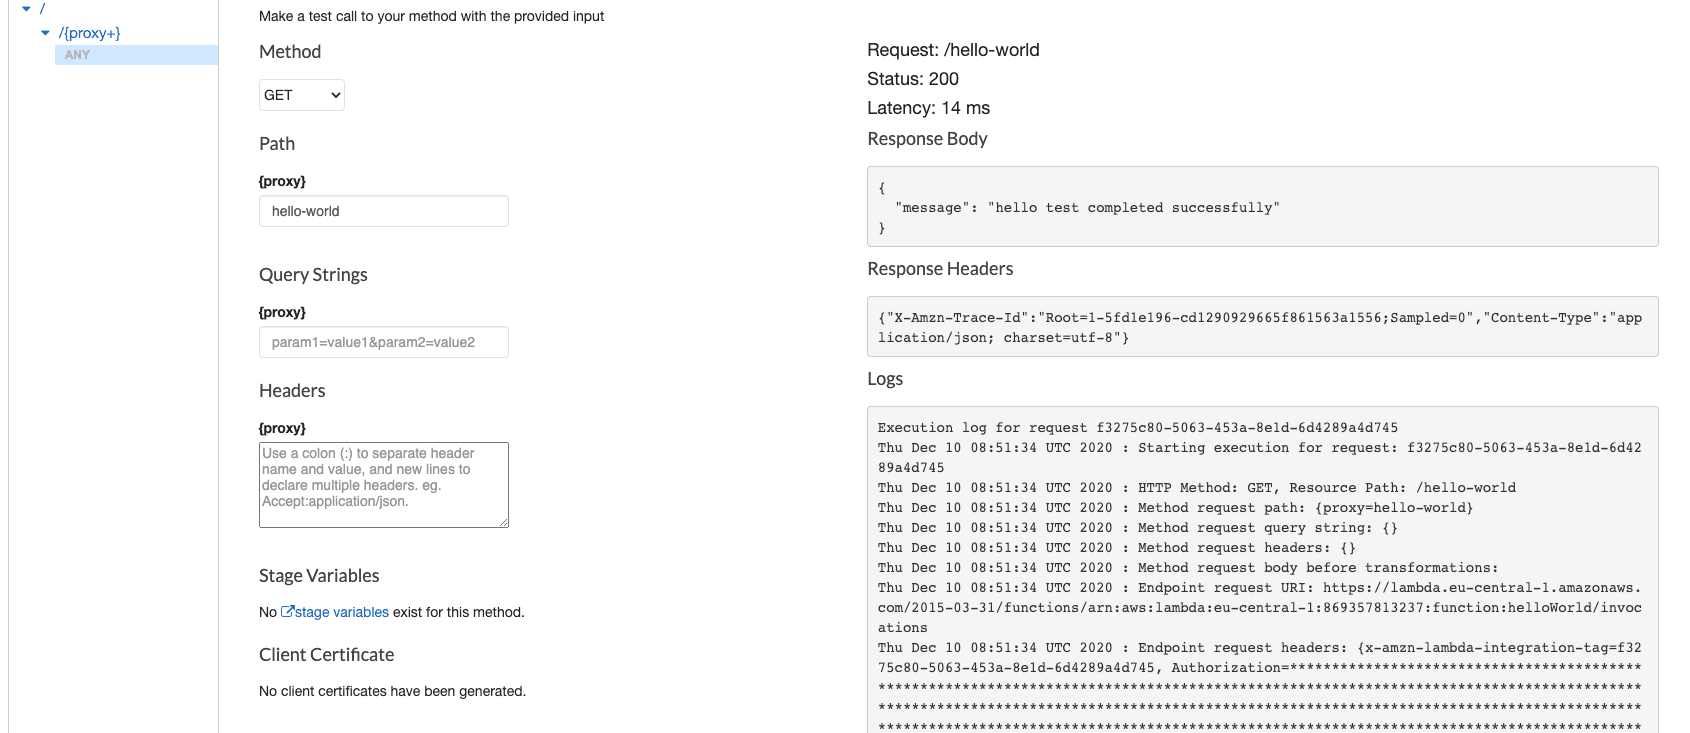
Hope you have got some idea about how to implement serverless microservices in Golang using AWS lambda and API Gateway, without using any serverless framework like AWS SAM.
Similar Articles


Get started today
Let's build the next
big thing!
Let's improve your business's digital strategy and implement robust mobile apps to achieve your business objectives. Schedule Your Free Consultation Now.
Get Free Consultation
Get started today
Let's build the next big thing!
Let's improve your business's digital strategy and implement robust mobile apps to achieve your business objectives. Schedule Your Free Consultation Now.
Get Free Consultation