Animations with CSS and Vue transitions
Introduction
Hello geeks, Hope you are doing well!
Today you will learn how to implement slider and continuous animations in VueJs using transitions and CSS.
So, without wasting time, let’s animate.
Sponsored
We are what we repeatedly do. Excellence, then, is not an act, but a habit. Try out Justly and start building your habits today!
What will you learn today?
1. Continuous horizontal animation in horizontal directions using just CSS. The animation will change direction based on user scrolling, whether you are scrolling the page up or down.
2. Slider animation using vue transitions.
Continuous horizontal animation
Let’s assume we have two horizontal divisions and each contains some elements. We want to animate them horizontally.
Setup
In the vue script, We are taking 5 elements horizontally for continuous animation.
<template>
  <div class="horizontal-grid">
    <div class="horizontal-grid-1">
      <div v-for="element in grid1" :key="element.id" class="elements">
        {{ element.name }}
      </div>
    </div>
    <div class="horizontal-grid-2">
      <div v-for="element in grid2" :key="element.id" class="elements">
        {{ element.name }}
      </div>
    </div>
  </div>
</template>

<script>
export default {
  data() {
    return {
      grid1: [
        {
          id: 1,
          name: "element1",
        },
        {
          id: 2,
          name: "element2",
        },
        {
          id: 3,
          name: "element3",
        },
        {
          id: 4,
          name: "element4",
        },
        {
          id: 5,
          name: "element5",
        },
      ],
      grid2: [
        {
          id: 1,
          name: "element1",
        },
        {
          id: 2,
          name: "element2",
        },
        {
          id: 3,
          name: "element3",
        },
        {
          id: 4,
          name: "element4",
        },
        {
          id: 5,
          name: "element5",
        },
      ],
    };
  },
};
</script>

<style scoped>
.horizontal-grid {
  overflow-x: hidden;
  overflow-y: auto;
  height: 500px;
}
.horizontal-grid-1,
.horizontal-grid-2 {
  display: flex;
}
// for triangle view of elements
.horizontal-grid-1 {
  margin-left: 160px;
}
.elements {
  border: 1px solid #e2e2e2;
  border-radius: 16px;
  padding: 16px;
  margin: 32px 0 0 32px;
  flex: 0 0 320px;
  display: flex;
  flex-direction: column;
  justify-content: center;
}
</style>
So UI will look like this,
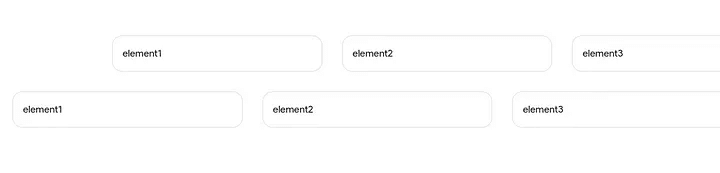
But, that’s not our requirement, right?
Requirements are :
- If you scroll down then it animates them to the left.
- If you scroll up then it animates them to the right.
- On hover of divisions, stop animation.
Implementation
1. Animate to the left
For continuous horizontal scroll to the left, we will append grid1 and grid2 data twice in horizontal-grid-1 and horizontal-grid-2 classes.
Also, will add an animation wrapper on horizontal-grid-1 and horizontal-grid-2 classes.
We animate the first 5 elements(of grid1 and grid2). Then to prevent showing a blank screen until the second loop starts, we added the same data two times. So it will display continuous movement.
<template>
  <div class="horizontal-grid">
    <div class="grid-animation">
      <div class="horizontal-grid-1">
        <div v-for="element in grid1" :key="element.id" class="elements">
          {{ element.name }}
        </div>
        <div v-for="element in grid1" :key="element.id" class="elements">
          {{ element.name }}
        </div>
      </div>
      <div class="horizontal-grid-2">
        <div v-for="element in grid2" :key="element.id" class="elements">
          {{ element.name }}
        </div>
        <div v-for="element in grid2" :key="element.id" class="elements">
          {{ element.name }}
        </div>
      </div>
    </div>
  </div>
</template>
width of div(1760) = (width(320) + margin-left(32)) of
elementsclass * number ofelements(5)
For continuous scroll to the left, we need to scroll grid-animation from the beginning(0px) to the same width of div to left(-1760px)
Add keyframes for animation according to the width of the div and apply that animation in grid-animation. The animation will be infinite as we want continuous scroll.
<style scoped>
// scroll animation keyframes
@keyframes scroll {
  0% {
    transform: translate(0px);
  }
  100% {
    transform: translate(-1760px);
  }
}
.grid-animation {
  animation: scroll 10s linear infinite;
}
</style>
That’s it, You can see the elements moving to the left.
2. Animate to the right
As we want to animate elements in both directions, let's append grid1 and grid2 data again.
If we want to animate in both direction then have to append data 2 times.
Add another animation class for reverse animation.
<template>
  <div class="horizontal-grid">
    <div class="grid-animation-reverse" :class="gridAnimation">
      <div class="grid-animation">
        <div class="horizontal-grid-1">
          <div v-for="element in grid1" :key="element.id" class="elements">
            {{ element.name }}
          </div>
          <div v-for="element in grid1" :key="element.id" class="elements">
            {{ element.name }}
          </div>
          <div v-for="element in grid1" :key="element.id" class="elements">
            {{ element.name }}
          </div>
        </div>
        <div class="horizontal-grid-2">
          <div v-for="element in grid2" :key="element.id" class="elements">
            {{ element.name }}
          </div>
          <div v-for="element in grid2" :key="element.id" class="elements">
            {{ element.name }}
          </div>
          <div v-for="element in grid2" :key="element.id" class="elements">
            {{ element.name }}
          </div>
        </div>
      </div>
    </div>
  </div>
</template>
For reverse scroll, we start the animation from same width of div (-1760px) to the beginning(0px)
Elements are scrolling left already, if we want to reverse its direction, then we have to move it with double speed(animation-duration: 5s).
Add keyframes for reverse animation. We keep the reverse animation state paused initially.
If scroll up then we will add the grid-animation-reverse-running class to the grid-animation-reverse division to play reverse animation.
<style scoped>
//animation in reverse
@keyframes scroll-reverse {
  0% {
    transform: translate(-1760px);
  }
  100% {
    transform: translate(0px);
  }
}
.grid-animation-reverse {
  animation: scroll-reverse 5s linear infinite;
  animation-play-state: paused;
}
.grid-animation-reverse-running {
  animation-play-state: running;
}
</style>
For deciding whether to scroll up or down, we want the difference between the current scroll and the last scroll.
Let’s add lastScrollY: 0 and gridAnimation: “” in the data hook and method for handling scroll in the method hook
<script>
export default {
  data() {
    return {
      grid1: [...],
      grid2: [...],
      lastScrollY: 0,
      gridAnimation: "",
    };
  },
  methods: {
    scrollHandler() {
      let diff = window.scrollY - this.lastScrollY;
      //scroll up
      if (diff < 0) {
        this.gridAnimation = "grid-animation-reverse-running";
      } else {
        this.gridAnimation = "";
      }
      this.lastScrollY = window.scrollY;
    },
  },
  mounted() {
    window.addEventListener("scroll", this.scrollHandler);
  },
  unmounted() {
    window.removeEventListener("scroll", this.scrollHandler);
  },
};
</script>
Check it on the browser, You will see the elements moving to the left on scroll down and right on scroll up.
The next requirement is quite easy now.
3. Stop animation on hover
For stop animation on hover, pause animation on hover like below.
We can add any custom style on elements class on hover. Here I have given box-shadow to elements and zoomed in by 97%.
<style scoped>
.grid-animation:hover,
.grid-animation-reverse:hover {
  animation-play-state: paused;
}
.elements:hover {
  cursor: pointer;
  box-shadow: 0 4px 8px 0 rgba(0, 0, 0, 0.2), 0 6px 20px 0 rgba(0, 0, 0, 0.2) !important;
  transform: scale(0.97);
}
</style>
That’s it, Run your code, and you will see a continuous horizontal scroll on your browser.
You can add as many elements as you want, remember the number of elements when calculating the total width of the div.
Slider animation
For slider animation, we will use Vue's transition-group elements which replicate ordered lists (ol) with tag = ”ol”.
Setup
We are using font-awesome for arrows.
Note : Before starting further, configure font-awesome setup with reference of given link.
<template>
  <div class="background text-center">
    <div class="horizontal-slider normal-text text-center">
      <div class="list-wrapper">
        //For dynamic transition name, used transition name like 'image-' +
        transitionName,
        <transition-group
          :name="'image-' + transitionName"
          tag="ol"
          class="list text-center"
        >
          <div
            v-for="(slide, i) in slides"
            :key="slide"
            class="image-item"
            :class="
              'image-item-' + Math.abs(i - (currentSlides.length - 1) / 2)
            "
          >
            <img
              :src="slide.image"
              alt="slide"
              draggable="false"
              loading="lazy"
            />
          </div>
        </transition-group>
      </div>
    </div>
    <div>
      <button type="button" class="indicators" @click="slide(-1)">
        <font-awesome-icon class="arrow" icon="arrow-left" id="leftArrow" />
      </button>
      <button type="button" class="indicators" @click="slide(1)">
        <font-awesome-icon class="arrow" icon="arrow-right" id="rightArrow" />
      </button>
    </div>
  </div>
</template>

<script type="module">
import { FontAwesomeIcon } from "@fortawesome/vue-fontawesome";
export default {
  data() {
    return {
      slides: [
        {
          id: "slide-1",
          image: require("@/assets/images/lisa.webp"),
        },
        {
          id: "slide-2",
          image: require("@/assets/images/marcus.webp"),
        },
        {
          id: "slide-3",
          image: require("@/assets/images/jake.webp"),
        },
        {
          id: "slide-4",
          image: require("@/assets/images/maor.webp"),
        },
        {
          id: "slide-5",
          image: require("@/assets/images/ramasis.webp"),
        },
        {
          id: "slide-6",
          image: require("@/assets/images/jimmy.webp"),
        },
      ],
      currentSlides: [],
      currentSlide: 0,
      transitionName: "",
    };
  },
  components: {
    FontAwesomeIcon,
  },
};
</script>

<style lang="scss" scoped>
.background {
  padding: 6% 0;
}
.horizontal-slider {
  margin: 50px auto 0;
  width: 60%;
}
.list-wrapper {
  position: relative;
  width: 100%;
  padding-top: 15%;
}
.list {
  position: absolute;
  width: 100%;
  top: 0;
  display: flex;
  align-items: center;
  justify-content: center;
  padding-left: 0;
}
.image-item {
  border-radius: 50%;
  position: relative;
  margin: 0 15px;
  background: linear-gradient(180deg, #ff9472 0%, #f2709c 100%);
}
.image-item > img {
  border-radius: 50%;
  position: absolute;
  top: 0;
  left: 0;
  width: 100%;
  height: 100%;
  border: 5px solid transparent;
}
.image-item-0 {
  opacity: 1;
  width: 15%;
  padding-top: 15%;
}
.image-item-1 {
  opacity: 0.4;
  width: 12%;
  padding-top: 12%;
}
.image-item-2 {
  opacity: 0.15;
  width: 9%;
  padding-top: 9%;
}
.indicators {
  background: none;
  border: none;
}
.arrow {
  border: 1px solid rgba(61, 61, 61, 0.15);
  border-radius: 15px;
  height: 45px;
  width: 45px;
  padding: 10px;
  color: #f2709c;
}
</style>
Math.abs(i-(currentSlides.length-1) / 2) : Calculation for setting image index to add styles for images like height, width, opacity etc…
class names will be likeimage-item-0,image-item-1,image-item-2.
After setup, You will see UI like this.

Let’s add life to div.
Implementation
On the left or right arrow click, move the slider to the left or right respectively.
Moving the slider to the left or right, we have to refresh the slide array every time.
We use refreshed array currentSlides instead of slides in the template now. And add click events on arrows.
<template>
  <div class="background text-center">
    <div class="horizontal-slider normal-text text-center">
      <div class="list-wrapper">
        <transition-group
          :name="'image-' + transitionName"
          tag="ol"
          class="list text-center"
        >
          <div
            v-for="(slide, i) in currentSlides"
            ...
          >
            ...
          </div>
        </transition-group>
      </div>
    </div>
     <div>
      <button type="button" class="indicators" @click="slide(-1)">
        <font-awesome-icon class="arrow" icon="arrow-left" id="leftArrow" />
      </button>
      <button type="button" class="indicators" @click="slide(1)">
        <font-awesome-icon class="arrow" icon="arrow-right" id="rightArrow" />
      </button>
    </div>
  </div>
</template>

<script type="module">
import { FontAwesomeIcon } from "@fortawesome/vue-fontawesome";
export default {
  data() {
    return {
      slides: [...],
      currentSlides: [],
      currentSlide: 0,
      transitionName: "",
    };
  },
  components: {
    FontAwesomeIcon,
  },
  methods: {
    slide(dir) {
      this.transitionName = dir === 1 ? "next" : "prev";
      this.currentSlide = this.getRoundedIndex(dir);  //image index which is showing in center
      this.refreshCurrentSlides();
    },
    // rotate array to either left or right based on currentSlide
    refreshCurrentSlides() {
      this.currentSlides.splice(
        0,
        5,
        this.slides[this.getRoundedIndex(-2)],
        this.slides[this.getRoundedIndex(-1)],
        this.slides[this.getRoundedIndex(0)],
        this.slides[this.getRoundedIndex(1)],
        this.slides[this.getRoundedIndex(2)]
      );
    },
    getRoundedIndex(diff) {
      var len = this.slides.length;
      return (this.currentSlide + diff + len) % len;
    },
  },
  mounted() {
    // initialize array with emplty elements and then refresh it with actual slides
    this.currentSlides.splice(0, 0, "", "", "", "", "");
    this.refreshCurrentSlides();
  },
};
</script>
In the slide(dir) ,
- dir: -1 for left and 1 for right
- transitionName: if dir is -1 then
nextelseprev - currentSlide: update the current slide according to the direction
- getRoundedIndex: used for getting image index from slides and refreshing currentSlides array.
The transition group has events like enter and leave, We can customize styles using those events. Learn more about events from transition-events.
<style lang="scss" scoped>
// translate image to 120% to right when image is entering to transition
.image-next-enter-active {
  transform: translate(120%);
}
//stop transform when image has entered from right
.image-next-enter-to {
  transform: translate(0%);
}
// hide image when it is leaving from transition
.image-next-leave-active {
  display: none;
}
// translate image to -120% to left when image is entering to transition
.image-prev-enter-active {
  transform: translate(-120%);
}
//stop transform when image has entered from left
.image-prev-enter-to {
  transform: translate(0%);
}
// hide image when it is leaving from transition
.image-prev-leave-active {
  display: none;
}
</style>
The slider animation is ready now, check it in your browser.
Similar Useful Articles

Let's Work Together
Not sure where to start? We also offer code and architecture reviews, strategic planning, and more.