Android OpenGL ES Part 2 — Shaders
Background
In previous article we learned how to draw our first triangle. We learned minimal code to draw shape using vertex buffer and simple shaders. We started from GLSurfaceView and went through the very basic steps required to draw mess on screen. I recommend having a look at previous story.
Now, it’s time to learn shaders in depth. In this article we are going to look at VertexShader and FragmentShader in detail. OpenGL allows us to use many other optional shaders too.
Sponsored
We are what we repeatedly do. Excellence, then, is not an act, but a habit. Try out Justly and start building your habits today!
Before we start we need to understand OpenGl graphics pipeline. It consists of following steps:

- We pass our vertex point for processing.
- Vertex processor transform vertices and create 3D object.
- Rasterization process each elements break down into pixel-sized pieces we can say fragment.
- Pixels pass through FragmentShader which fill each and every fragment with given color.
- Finally merged output is ready to display on screen. This output is sent to the screen in pixels.
Pretty simple!!
Let's Get Started!
The complete shader program contains many sub-program for every stage. Each mini-program(shader) is compiled, and the whole set are linked together to form the executable shader program— called a program by OpenGL.
Each shader resembles a small C program. Each of these shaders can be stored in a C string, or in a plain text file.
Shader Structure
in <type> <in variable name>;
in <type> <in variable name>;
out <type> <out variable name>;
uniform <type> <uniform name>;
init main(){
     // Process input and/or do some graphics stuff
     ...
     // Output processed stuff to output variable
     <out variable here> = stuff here;
}
Vertex Shader
The vertex shader is responsible for transforming vertex positions into clip space. It can also be used to send data from the vertex buffer to fragment shaders. Vertex shaders perform operations on each vertex, and the results of these operations are used in the fragment shaders which do additional calculations per pixel.
private val vertexShaderCode =
    "attribute vec4 vPosition;" +
            "void main() {" +
            "  gl_Position = vPosition;" +
            "}"
We can see the in key-word for input to the program from the previous stage. GLSL(Shader) also has an out key-word for sending a variable to the next stage. The input to a vertex buffer (the in variables) come from blocks of memory called vertex buffers. We usually copy our vertex positions into vertex buffers before running our main loop.
Fragment Shader
Once all of the vertex shaders have computed the position of every vertex, then the fragment shader runs once for every fragment between vertices. The fragment shader is responsible for setting the color of each fragment.
private val fragmentShaderCode =
    "precision mediump float;" +
            "uniform vec4 vColor;" +
            "void main() {" +
            "  gl_FragColor = vColor;" +
            "}"
The uniform key-word indicate that we are sending in a variable to the shader program from the CPU. The colors are rgba, or red, green, blue, alpha. The values of each component are floats between 0.0 and 1.0.
Now, we are going to create a nice multicolor triangle. We will only modify our Triangle class which I created in previous article.
Defining Triangle coordinates
// Define points for equilateral triangles.
val triangleVertices = floatArrayOf(
    0.0f, 0.5f, 0.0f,   //TOP
    0.5f, -0.5f, 0.0f,  //BOTTOM-LEFT
    -0.5f, -0.5f, 0.0f  //BOTTOM-RIGHT
)
Defining vertex and fragment shader
private val vertexShader = """
        attribute vec4 aPosition;
        uniform vec4 aColor;
        out vec4 vColor;
        void main()
          {
             vColor = aColor;
             gl_Position = aPosition;
          }"""
Here First, we have one attribute for position. We will get the value of position from vertex buffer. And the second uniform value is for our vertex color. Then we define out vec4 which passes the value of color from vertex to fragment shader.
private val fragmentShader = """
         precision mediump float;
         in vec4 vColor;

         void main()
           {
             gl_FragColor = vColor;
           }"""
Fragment shader on the other hand has the value for color of each vertex. The value of color we will get from our vertex shader.
Define vertex buffer
private var vertexBuffer: FloatBuffer =
    ByteBuffer.allocateDirect(triangleVertices.size * mBytesPerFloat).run {
        // use the device hardware's native byte order
        order(ByteOrder.nativeOrder())
        // create a floating point buffer from the ByteBuffer
        asFloatBuffer().apply {
            // add the coordinates to the FloatBuffer
            put(triangleVertices)
            // set the buffer to read the first coordinate
            position(0)
        }
    }
Load shader in to shader handler/program.
private var mProgram: Int
/** How many bytes per float.  */
private val mBytesPerFloat = 4
/** How many elements per vertex.  */
private val mStrideBytes = 3 * mBytesPerFloat
/** This will be used to pass in model position information.  */
private var mPositionHandle = 0
/** This will be used to pass in model color information.  */
private var mColorHandle = 0
private fun loadShader(type: Int, shaderCode: String): Int {
    // create a vertex shader type (GLES20.GL_VERTEX_SHADER)
    // or a fragment shader type (GLES20.GL_FRAGMENT_SHADER)
    return GLES20.glCreateShader(type).also { shader ->
        // add the source code to the shader and compile it
        GLES20.glShaderSource(shader, shaderCode)
        GLES20.glCompileShader(shader)
    }
}
init {
        val vertexShader: Int = loadShader(GLES20.GL_VERTEX_SHADER, vertexShader)
        val fragmentShader: Int    =loadShader(GLES20.GL_FRAGMENT_SHADER, fragmentShader)
        mProgram = GLES20.glCreateProgram().also {

            GLES20.glAttachShader(it, vertexShader)
            GLES20.glAttachShader(it, fragmentShader)
            // creates OpenGL ES program executables
            GLES20.glLinkProgram(it)
        }
// Set program handles. These will later be used to pass in values to the program.
mPositionHandle = GLES20.glGetAttribLocation(mProgram, "aPosition")
mColorHandle = GLES20.glGetUniformLocation(mProgram, "aColor")
      // Add program to OpenGL ES environment
        GLES20.glUseProgram(mProgram)
    }
First, we create our shader and then we create our program by attaching our shader to it. And then we link our program to make it executable.
Now, it’s time to do real draw. Here’s our draw method which we going to call from Renderer’s onDrawFrame() .
fun draw() {
    GLES20.glClear(GLES20.GL_DEPTH_BUFFER_BIT or GLES20.GL_COLOR_BUFFER_BIT)
    GLES20.glVertexAttribPointer(
        mPositionHandle, 3, GLES20.GL_FLOAT, false,
        mStrideBytes, vertexBuffer
    )
    GLES20.glEnableVertexAttribArray(mPositionHandle)
    // Set color for drawing the triangle
    val time = System.currentTimeMillis().toDouble()
    val blueColor = ((sin(time) / 2f) + 0.5f).toFloat()
    val redColor = ((cos(time) / 2f) + 0.5f).toFloat()
    val color = floatArrayOf(redColor, 0.0f, blueColor, 1.0f)
    GLES20.glUniform4fv(mColorHandle, 1, color, 0)
    // Draw the triangle
    GLES20.glDrawArrays(GLES20.GL_TRIANGLES, 0, 3)
}
This is where stuff actually draw on screen. We first clear the screen.
We then tell OpenGL to how to use this data by using glVertexAttribPointer. OpenGl use specified data and feed in to vertex shader by applying it to our position attribute.
Then We calculate our blue and red color value from system current time. Using color handle we set our calculated color to color uniform by using glUniform4fv() .
And at the end we tell which type of element we want to draw by specifying position of starting component of vertex and the size of vertex in glDrawArrays()
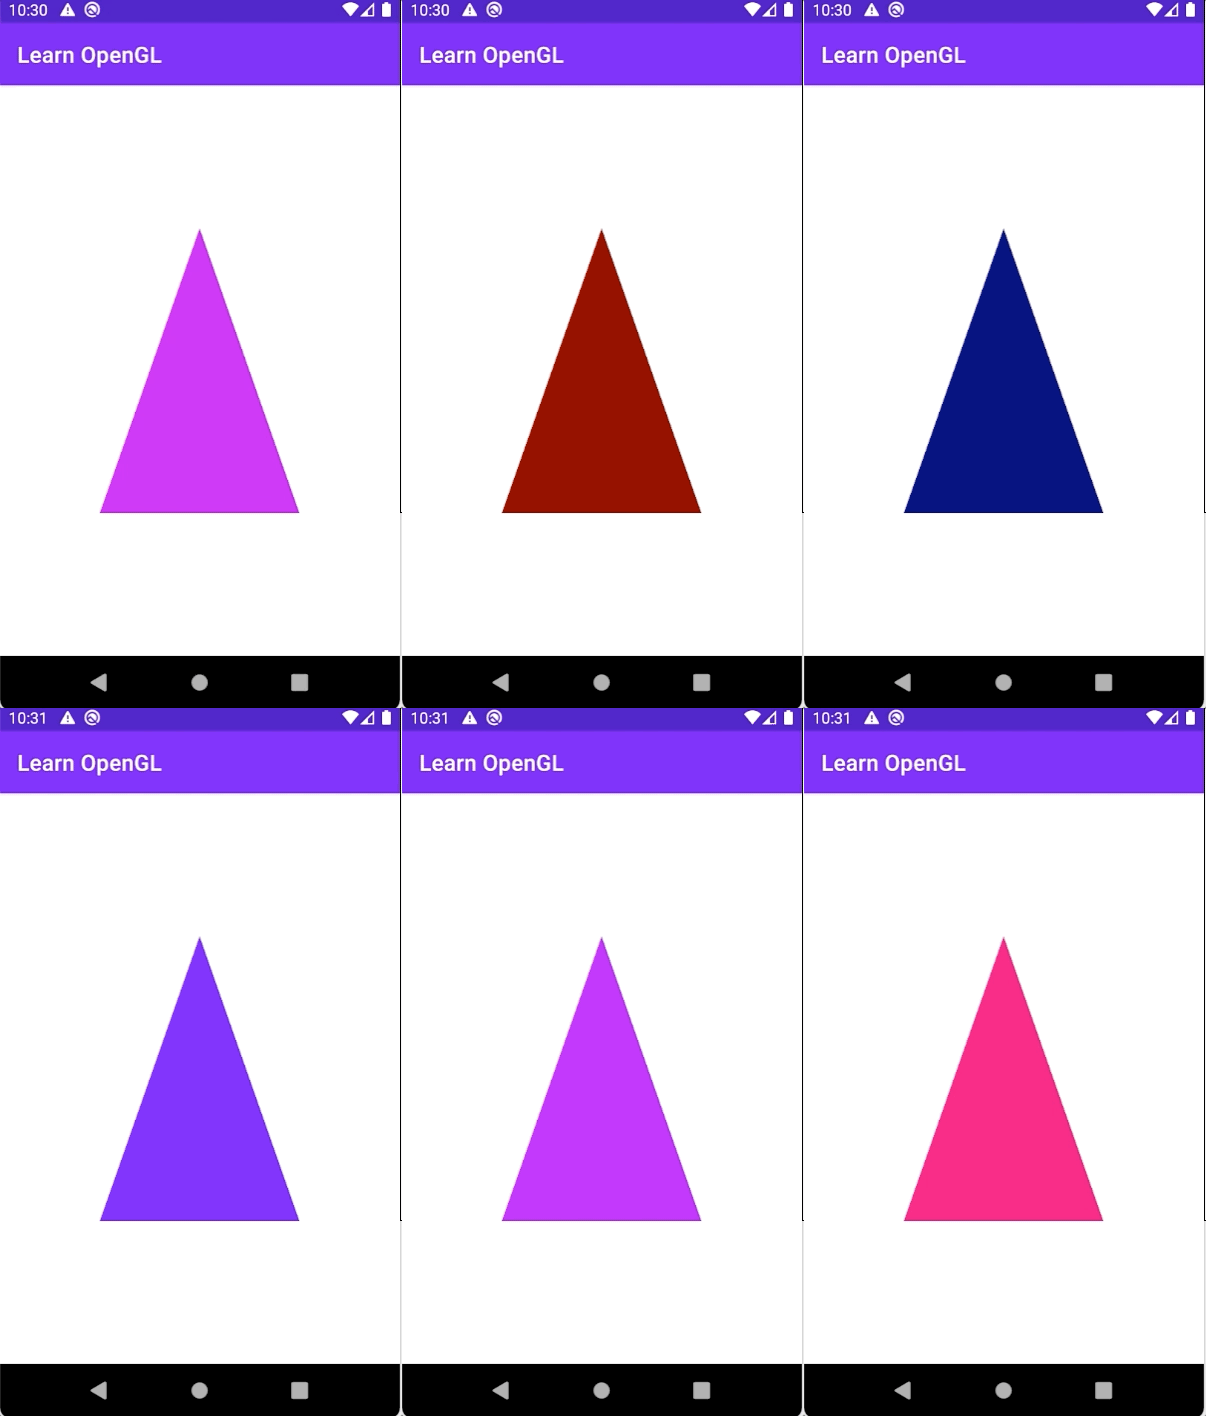
Hurray!! after you run your application. You have nice animated triangle in your emulator or phone’s screen. It looks something like this. You can fine complete source code the sample app HERE.

Related Useful Articles


Let's Work Together
Not sure where to start? We also offer code and architecture reviews, strategic planning, and more.
