Add Flutter View to Native iOS App
Background
I know we all love Flutter but it’s not always possible to migrate the whole app into Flutter all at once. As a solution, we can add the Flutter project as a library or module to our existing native app. With the add-to-app feature, we can do just that and more!
It is also helpful when we want to implement the same thing in the Android and iOS apps. In that case, no need to write a separate code for both platforms. You can create a single view in Flutter and then use it on both platforms as a separate module.
You can check out the official docs if you’re not familiar with the concept.
In this post we will implement a simple demo application in iOS which will have two Flutter pages, on the first page, we’ll show a list of users, and the second screen will be the user detail screen.
We’ll embed the Flutter module in our native iOS application as a package Library.
Sponsored
We are what we repeatedly do. Excellence, then, is not an act, but a habit. Try out Justly and start building your habits today!
Create a Flutter module
To begin with, if you haven’t already installed the Flutter SDK on your system, then it’s a great time to do that. Go ahead and follow this link to find instructions for setting up Flutter on your machine.
All set? Great !!!
Let’s first start with creating the Flutter module from the existing Flutter project.
From a command line interface, navigate to a directory where you would like to save your Flutter module in your Flutter project, and then run the following command with the Flutter CLI tool:
flutter create -template module --org com.demo flutter_libThis command will create a flutter module with .android and .ios hidden folder. Those folders are auto-generated so do not make any changes.
Then run flutter pub get in the flutter_lib directory.
We’re done with the setup. Now let’s add a screen to the module’s main.dart.
We’re not going to cover flutter implementation.
Here’s our Flutter module app. The full source code is available on GitHub. You can copy it from here to your dart file.
In the end, we will have an app like the one below.
Generate iOS Framework from the module
Now, Let’s start integrating the Flutter module into our native iOS application.
In our main.dart file inside flutter_lib/lib , we have already defined the entry point function which we’ll call from our Native module.
That Entry Point function is something like this,
@pragma("vm:entry-point")
void nativeLoad() async {
    WidgetsFlutterBinding.ensureInitialized();
    runApp(MyApp());
}
This function will be called from the iOS app. So whatever View is launched on call of this function will be integrated into the iOS app. We’ll see its use further below.
Now let’s generate the iOS framework from the Flutter module.
According to Flutter doc, we have many ways to create an iOS framework and embed it with the native project, but here we are going to use its second option named Embed frameworks in Xcode.
Let’s first generate an iOS framework. Run this command from the flutter_lib directory.
flutter build ios-frameworkIt will create 3 separate directories of the framework as shown below.
some/path/MyApp/flutter_lib/build/ios
└── Flutter/
    ├── Debug/
    │   ├── Flutter.xcframework
    │   ├── App.xcframework
    │   ├── FlutterPluginRegistrant.xcframework (only if you have plugins with iOS platform code)
    │   └── example_plugin.xcframework (each plugin is a separate framework)
    ├── Profile/
    │   ├── Flutter.xcframework
    │   ├── App.xcframework
    │   ├── FlutterPluginRegistrant.xcframework
    │   └── example_plugin.xcframework
    └── Release/
        ├── Flutter.xcframework
        ├── App.xcframework
        ├── FlutterPluginRegistrant.xcframework
        └── example_plugin.xcframework
If you only want to generate a particular single build type then it’s also possible.
Suppose we only want to generate a framework for the debug app then the command will be something like this,
flutter build ios-framework --no-release --no-profileor
flutter build ios-framework --debugDone? Now, Let’s go ahead.
Integrate & Embed the framework into the native app
The generated dynamic frameworks must be embedded into your app to be loaded at runtime.
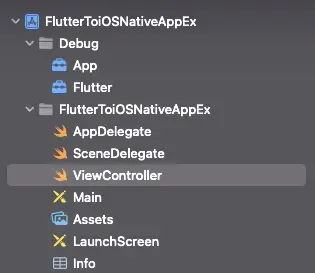
We can embed the framework simply by dragging and dropping it into the root directory of the iOS project.
It will look like this,
Now we must check that all added frameworks are embedded in the project.
For that navigate to your target’s Build Settings > General > Frameworks, Libraries, and Embedded Content section and select Embed & Sign from the drop-down list for added frameworks.

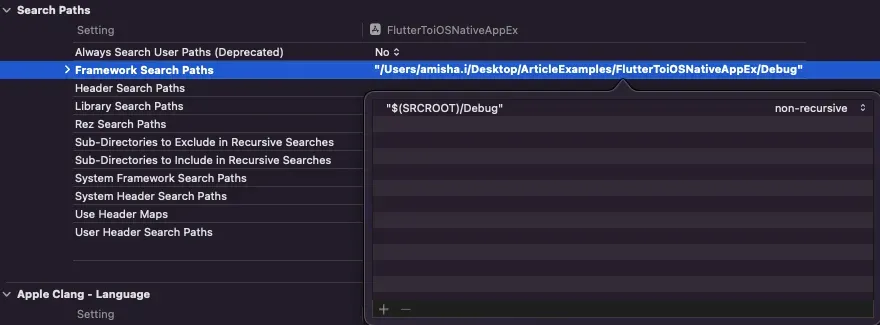
But still, that’s not enough, we also have to give a search path of the added framework directory.
In the target’s build settings, add “$(SRCROOT)/Debug” to the Framework Search Paths (FRAMEWORK_SEARCH_PATHS) or you can simply drag and drop the directory to that option’s value section.
That’s it. You should be able to build the project without any errors now.
Open flutter view as UIViewController
To launch a Flutter screen from an existing iOS, we will have to use FlutterEngine and FlutterViewController classes.
According to Flutter Doc, —
The
FlutterEngineserves as a host to the Dart VM and your Flutter runtime, and theFlutterViewControllerattaches to aFlutterEngineto pass UIKit input events into Flutter and to display frames rendered by theFlutterEngine.
Let’s first add a simple button in the main viewController, so that we can open the Flutter view with the click of that button.

Now let’s see how we can open flutter views.
a. Create the FlutterEngine
Let’s first modify AppDelegate.swift file to make the required changes.
import UIKit
import Flutter

// Used to connect plugins (only if you have plugins with iOS platform code).
// import FlutterPluginRegistrant

@UIApplicationMain
class AppDelegate: FlutterAppDelegate { // More on the FlutterAppDelegate.
  lazy var flutterEngine = FlutterEngine(name: "my flutter engine")

  override func application(_ application: UIApplication, didFinishLaunchingWithOptions launchOptions: [UIApplication.LaunchOptionsKey: Any]?) -> Bool {
    // Runs the default Dart entrypoint with a default Flutter route.
    flutterEngine.run(withEntrypoint: "nativeLoad", libraryURI: "package:flutter_lib/main.dart")
    // Used to connect plugins (only if you have plugins with iOS platform code).
    // GeneratedPluginRegistrant.register(with: self.flutterEngine);
    return super.application(application, didFinishLaunchingWithOptions: launchOptions);
  }
}
Here we made the following changes —
- As per the flutter requirement, we have to conform to the
FlutterAppDelegateprotocol in theAppDelegateclass. - After that, we created an instance of
FlutterEngineclass,nameargument could be anything you like! - In this project, we are only opening a single flutter view so we added only one
flutterEngine, but if you have to open more than one flutter view then you will have to create separate engines accordingly. - After that, we have added a flutter run statement, here for arguments — withEntrypoint: We have to pass the entryPoint function name which we had configured in the flutter module’s
main.dartfile.
libraryURI: Pass the module’s dart file path. Otherwise, it’ll simply open an empty blur screen.
We must have to pass the dart file location with the
package:keyword, otherwise it will not work properly in the few cases.
b. Open Flutter view as UIViewController
Now we only have to open Flutter View with the click of the given login button.
Let’s take @IBAction of the Login button and add code to open the flutter view in its block, so our ViewController will look like this,
import UIKit
import Flutter

class ViewController: UIViewController {

    @IBOutlet weak var loginButton: UIButton!

    override func viewDidLoad() {
        super.viewDidLoad()
        loginButton.layer.cornerRadius = loginButton.frame.height / 2
    }

    @IBAction func onLoginBtnClick(_ sender: UIButton) {
        let flutterEngine = (UIApplication.shared.delegate as! AppDelegate).flutterEngine
        let flutterViewController = FlutterViewController(engine: flutterEngine, nibName: nil, bundle: nil)
        present(flutterViewController, animated: true, completion: nil)
    }
}
Very easy to understand, isn’t it?
It’s simply getting the flutter engine’s object from the AppDelegate class and using that to open the view with FlutterViewController.
That’s it. Now you can run the app!
Conclusion
That’s it for today. Hope you learned something and you have an idea of how the flutter module integration can take place in iOS applications.
If you face any problems then feel free to ask by adding a comment.
Related Popular Article

Let's Work Together
Not sure where to start? We also offer code and architecture reviews, strategic planning, and more.