Add Flutter View to Native Android Application
Background
With the add-to-app feature, we can add flutter UI to our existing app, as it’s not always possible to migrate the whole app into Flutter all at once. We can add the Flutter project as a library or module to our Native app.
You can check out the official docs if you’re not familiar with the concept.
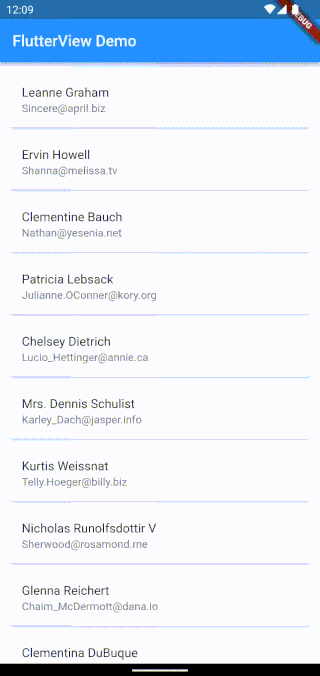
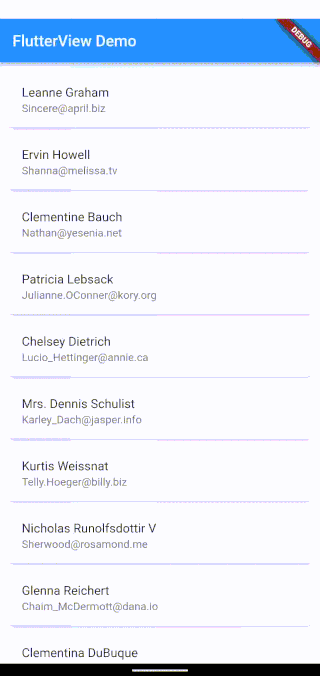
Today, we’re going to implement a simple demo application in android which will have two Flutter pages, on the first page, we'll show a list of users, and the second screen will be the user detail screen.
We’ll embed the flutter module in our android native application as an AAR Library.
I have divided the article into 4 logical steps to make understanding easier.
- Create Flutter module
- Generate AAR files from the module
- Integrate the flutter module into the android app
- Configure Activity to make use of Flutter view
Sponsored
We are what we repeatedly do. Excellence, then, is not an act, but a habit. Try out Justly and start building your habits today!
Alright, Let’s Get Started!
Create flutter module
Let’s first start with creating the Flutter module.
flutter create -t module --org com.demo flutter_libThis will create a flutter module with .android and .ios hidden folder. Those folders are auto-generated so do not make any changes.
Then run flutter pub get in the flutter_lib directory.
We’re done with the setup. Now let’s add a screen to the module’s main.dart. We’re not going to cover flutter implementation.
Here’s our flutter module app. The full source code is available on Github.
Generate AAR files from the module
Now Let’s integrate the flutter module into our native android application.
In our main.dart file inside flutter_lib define entry point function which we’ll call from our Native module.
@pragma("vm:entry-point")
void nativeLoad() async {
  WidgetsFlutterBinding.ensureInitialized();
  runApp(MyApp());
}
Let’s generate AAR (library) to add to our android application.
Move to our flutter module directory by cd path/to/flutter_lib
Run flutter pub get
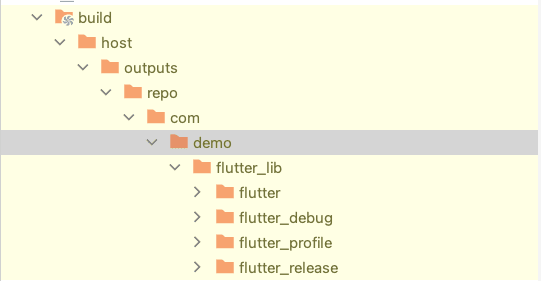
flutter build aarThis will generate a few files at flutter_lib/build/host/outputs/repo
Integrate the Flutter module into the Android app
Now you can copy/paste all generated files within your native android project or you can use these files as a standalone project. We’ll add all these files to the android project locally, later you can publish them on maven central to use it directly from remote instead of depending on local configuration.
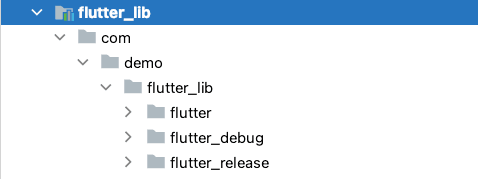
To do so, let’s create a directory to add generate files in your android project at myAndroidDemo/flutter_lib Copy all files from flutter_lib/build/host/outputs/repo and add inside our flutter_lib directory of the android project.
In app’s build.gradle file add
repositories {
    google()
    mavenCentral()
    maven {
        url '../flutter_lib'
    }
    maven {
        url 'https://storage.googleapis.com/download.flutter.io'
    }
}
Add the following dependencies to use the flutter module in app’s build.gradle
debugImplementation 'com.demo.flutter_lib:flutter_debug:1.0'
releaseImplementation 'com.demo.flutter_lib:flutter_release:1.0'
Define source compatibility in our host android application.
android {
  compileOptions {
    sourceCompatibility JavaVersion.VERSION_1_8
    targetCompatibility JavaVersion.VERSION_1_8
  }
}
Clean and Rebuild the project.
Now we’re ready to use the flutter module in the android project
Inside our activity_main.xml add FlutterView.
<?xml version="1.0" encoding="utf-8"?>
<io.flutter.embedding.android.FlutterView xmlns:android="http://schemas.android.com/apk/res/android"
    xmlns:tools="http://schemas.android.com/tools"
    android:layout_width="match_parent"
    android:layout_height="match_parent"
    android:fitsSystemWindows="true"
    tools:context=".MainActivity" />
To render the flutter widget in our FlutterView we need to attach our flutter view to FlutterEngine, which is the container to run dart code in the Native application.
private lateinit var engine: FlutterEngine

override fun onCreate(savedInstanceState: Bundle?) {
    super.onCreate(savedInstanceState)
    binding = ActivityMainBinding.inflate(layoutInflater)
    setContentView(binding.root)
    init()
}

private fun init() {
    engine = FlutterEngine(this)
    engine.dartExecutor.executeDartEntrypoint(
        DartExecutor.DartEntrypoint(
            FlutterInjector.instance().flutterLoader().findAppBundlePath(),
            "nativeLoad"
        )
    )
}
We’ve just created our flutter engine instance and set up the entry point function to execute.
dartExecutor — used to start executing Dart code from a given entry point
executeDartEntrypoint — Starts executing Dart code based on the given dartEntrypoint.
DartExecutor.DartEntrypoint — specifies which Dart function to run, and where to find it.
with DartExecutor.DartEntrypoint.createDefault() you can render main entry point.
Here we want to load a custom entry point nativeLoad . You can change it according to requirements.
Configure Activity to make use of Flutter view
Now let’s attach the activity to the flutter engine. but before this, we need to make our activity ExclusiveAppComponent to make it attachable to the Flutter Engine.
class MainActivity : AppCompatActivity(), ExclusiveAppComponent<Activity> {
  override fun detachFromFlutterEngine() {
      detachFlutterView()
  }

  override fun getAppComponent(): ComponentActivity {
      return this
  }
}
As a component, you can pass Activity, Service, Broadcast Receiver, and Content Provider as per your requirement.
We need to override two methods of ExclusiveAppComponent .
- detachFromFlutterEngine — Called when another App Component is about to become attached to the FlutterEngine this App Component is currently attached to.
- getAppComponent — Retrieve the App Component behind this exclusive App Component.
Now attach thecomponent to the engine through activityControlSurface
engine.activityControlSurface.attachToActivity(
     this, this.lifecycle
)
And attach our FlutterView to FlutterEngine.
binding.flutterView.attachToFlutterEngine(engine)This will connect FlutterView to the engine, and start rendering the UI.
Also, we need to make our FlutterEngine about activity lifecycle events.
override fun onResume() {
    super.onResume()
    engine.lifecycleChannel.appIsResumed()
}

override fun onPause() {
    super.onPause()
    engine.lifecycleChannel.appIsPaused()
}
lifecycleChannel send android lifecycle events to Flutter.
Also, we need to detach activity and flutter view from the flutter engine surface whenever our activity destroy.
override fun onDestroy() {
    super.onDestroy()
    detachFlutterView()
}

private fun detachFlutterView() {
    engine.activityControlSurface.detachFromActivity()
    engine.lifecycleChannel.appIsDetached()
    binding.flutterView.detachFromFlutterEngine()
}
Now let’s run the android application.

It’s rendering out flutter UI but if you notice on back press instead of navigating back to the user list screen, it finishes the activity.
override fun onBackPressed() {
    engine.navigationChannel.popRoute()
}
Let’s override onBackPressed on activity and pass it to the flutter engine. And it should fix our issue.
Conclusion
That’s it for today, hope you learned something new!
The complete source code of the android application is available on Github.
We’ve successfully rendered FlutterView in our native android application. Adding FlutterView directly to the custom screen is not easy as adding FlutterActivity and FlutterFragment in the app. I hope this simple example helps you to clarify how to flutter add-to-app works.
Related Articles