
Step-by-step guide for how to send emails using AWS SES in Ruby on rails
Introduction
Send email using ruby on rails action mailer and aws-sdk-ses gem, without using SMTP.
I was looking for a solution to send emails to custom members in one of our RoR projects. I think most developers use a mail gem to send emails using Rails, but what if we like to use AWS to perform the same task?
There are multiple Gems available that serve the same purpose. Here is what I found the most useful and easy gem, that I want to share with you guys!
Sponsored
We are what we repeatedly do. Excellence, then, is not an act, but a habit. Try out Justly and start building your habits today!
Assuming that you guys have already set up and verified your email in AWS SES. And, if you didn’t, configure using How to set up custom MAIL FROM domain and verify the email address in Amazon SES.
Following configuration is required for getting the work done:
- ruby > 2.6.0 and rails > 5.x.x installation.
- Installed aws-sdk-ses Gem.
P.S. If you didn’t install aws-sdk-ses gem, add it to Gemfile, and don’t forget to run bundle install.
Let’s hit the ground with code now…
First, we need to create an AWS SES session for sending mail, So, let’s add two new mailers to the project.
Performing the following steps allows you to configure basic mailers setup into your repo.
- Run rails generate mailer UserMailer command, this will generate mailers/user_mailer.rb and views/user_mailer.
Fill user_mailer.rb with the following code.
require 'aws-sdk-ses'class UserMailer < ApplicationMailerdef signup_email
    @user = params[:user]
    receiver = @user.email
    sender = "support@ici.com"
    subject = "Welcome email"

    # The HTML body of the email
    htmlbody = render_to_string(:partial =>   'user_mailer/email_template.html.erb', :layout => false, :locals => {:user => @user})

    # send email
    send_email(receiver, sender, subject, htmlbody)
enddef send_email (receiver, sender, subject, htmlbody)
   region = "ap-southeast-1"

   # Specify the text encoding scheme.
   encoding = "UTF-8"    # configure SES session
   ses = Aws::SES::Client.new(
      region: region,
      access_key_id: "XXXXXXXXXX",
     secret_access_key: "XXXXXXXXXXXXXXXXXXXXX"
)

   begin
      ses.send_email({
         destination: {
            to_addresses: [
               receiver,
            ],
            },
         message: {
            body: {
               html: {
               charset: encoding,
               data: htmlbody,
              }
            },
         subject: {
            charset: encoding,
            data: subject,
         },
         },
         source: sender,
         })
      puts "Email sent!"
  rescue Aws::SES::Errors::ServiceError => error
      puts "Email not sent. Error message: #{error}"
  end
 end
end
where
- @user : user object,
- sender : amazon SES verified sender email address,
- htmlbody : the parsed html format of email_template.html.erb file,
- region : AWS region
Replace AWS credentials with yours in the # configure SES session section. We passed the user object to our email template. Let’s see how simply we can deal with it in the next step.
2. We will need an HTML email template to send the email. let’s configure it first. create _email_template.html.erb at views/user_mailer directory. The structure will look like views/user_mailer/_email_template.html.erb. Don’t forget the leading underscore(_) in the file name, otherwise, it will not get parsed (That we are going to see below).
Content of email.template.html.erb file :
<!Doctype html><html lang="en-US">
<head>
<meta content="text/html; charset=utf-8" http-equiv="Content-Type" /></head><body><h1>Welcome to the canopas blog </h1><p align="left"> Hello <%= user.first_name%>,</p><p> Thanks for being a part of ICI family, we are glad to serve you !! </p><p> Regards, </p><p> The ICI team </p></body></html>
Please note that we have to create a template file with a preceding underscore(_email_template.html.erb) and in the mailer, we have to ignore it(: partial => ‘user_mailer/email_template.html.erb’), as rails will detect it automatically.
3. Now, it’s time to call UserMailer to send mail. To send welcome emails on user signup, we need to add the following code to the create method.
def create
    @user = User.new(user_params)
    if @user.save
      UserMailer.signup_email(@user).deliver_later
      ...
    end
end
you can use deliver_now instead of deliver_later if you need to send mails on the spot(for example, you are sending verification mails). I particularly used deliver_later to send mail asynchronously, as it’s not required any compulsion from the user side.
Woo hoo !!, we are done with our code. Let’s hit the signup button and see the magic.
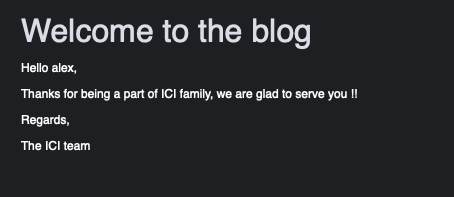
The sent email will look like below.
It will print the error message in the console if anything goes wrong. Otherwise, you will receive an email. Check your inbox.
Key benefits:
- You don’t need to install mail Gem for sending emails.
- Using Amazon SES, you can get rid of configuring SMTP credentials in AWS(as is required when using mail gem with SMTP configuration).
- You just need to verify the sender email address in SES and you are all set to go…hurray!!
More mailing
You can send mails by using different methods as documented in ruby mailer docs using action mailer, but if you want to set up mail-sending functionality without configuring action mailer, you can go with AWS SES.
Related Useful Articles


Get started today
Let's build the next
big thing!
Let's improve your business's digital strategy and implement robust mobile apps to achieve your business objectives. Schedule Your Free Consultation Now.
Get Free Consultation
Get started today
Let's build the next big thing!
Let's improve your business's digital strategy and implement robust mobile apps to achieve your business objectives. Schedule Your Free Consultation Now.
Get Free Consultation